Setting up the sound on the Sony Vaio PCG-GRT896HP

Well, we tried to set up the sound yesterday, after the last post. It was fairly easy to do since we decided to start from scratch. The kernel was recompiled throwing everything in the sound category out, except from sound card support. Then we got alsa-lib-1.0.10, alsa-driver-1.0.10 and alsa-utils-1.0.10 and installed the packages in this order. We ran alsaconf and it was all set!

Installing Slackware 10.1 on a Sony Vaio PCG-GRT896HP with no CD or Floppy drive.

I just got a second hand Sony Vaio PCG-GRT896HP and decided to get rid of XP installed there and make a fresh Slackware 10.1 installation. The laptop is heavy-duty having a Pentium 4 processor at 2.8GHz, 512Mb RAM, 60Gb of hard disk space, 16″ screen, lots of ports and 802.11b/g support making it perfect to use for computational work at the university and at home. The problem: the laptop’s combo CD/DVD burner was heavily used and out of the game. I had available an external USB combo CD/DVD burner but the BIOS did not support booting from USB. So the decision was to make a network installation but while searching for the relative info we stumbled on this:

http://marc.herbert.free.fr/linux/win2linstall.html

It just looked too good for us not to try! The target was to set the XP machine to boot into GRUB and start the Slackware installer hoping that it would then mount the external USB drive to do the installation. Installing GRUB was like a walk in the park in our case. The package GRUB_for_DOS provides the two needed files grldr and menu.lst. The file grldr was copied to C:\ and then the following line was appended to boot.ini:

C:\grldr=”Start GRUB”

To make boot.ini editable, the command attrib c:\BOOT.INI -s -h -r was issued from the command line and after the addition the file was reinstated with attrib c:\BOOT.INI +s +h +r.Then the whole /boot directory from the GRUB_for_DOS package was copied to C:\ and within the C:\boot directory the bare.i kernel and the initrd.img installer image were copied. Since we were only interested about booting to the installer we did not copy any packages as these would (hopefully) be installed from the USB device. The C:\boot\grub\menu.lst was edited in order to contain these lines:

title My Linux installer of choice
kernel (hd0,0)/boot/bzImage
initrd (hd0,0)/boot/initrd.img

Edit: we copied menu.lst to C:\ to avoid any version-specific problems of GRUB_for_DOS

We did not pass any extra parameters to the kernel but at some other cases this would be very helpful. So that was the GRUB installation. Reboot, fingers crossed and it worked! At the XP boot screen we had a new menu item pointing to GRUB which in turn loaded the copied kernel. Doing this procedure was very important because there was no way that the machine would be rendered unbootable leading us to bigger adventures. If there was a mistake in the GRUB configuration we could boot in XP and make corrections. Once we reached the system shell we could start the installation scripts. First we partitioned the hard drive:

Filesystem Type Size Used Avail Use% Mounted on
/dev/hda1 ext2 9.7G 4.7G 4.6G 51% /
/dev/hda2 reiserfs 25G 34M 25G 1% /disk1
/dev/hda3 reiserfs 23G 34M 23G 1% /disk2

The external USB CD/DVD combo drive was mounted under /dev/sr0 so we made a link pointing to /dev/cdrom and mounted the first Slackware 10.1 installation disk. Since we had booted from the kernel copied to the hard disk we ran setup and just selected /dev/cdrom as the source for the installation.

We proceeded with the installation of the packages from the first CD but we encountered a problem soon. When we were prompted to insert the second installation disc there was no way to unmount the disc. Many remedies to this were attempted including force unmount and even unplugging the drive from the laptop and from the power, taking the CD out and then trying to remount. All resulted in some strange bug (?) where the system somehow saw a different partition table where hda1 was full at that moment thus not allowing the installation of any more packages. Each time the installation script was halted and after that all seemed normal again except that we had to run setup from the beginning without rebooting of course. Then we decided to stop the installation when the first CD finishes and put the rest later on. So fingers crossed again and voila! The Sony Vaio booted for its first time in Slackware 10.1. The rest of the packages were easily installed using pkgtool.

This is the point where the debugging starts. First of all, Slackware 10.1 comes with Gnome along with the other window managers. In order to boot without annoying system errors in Gnome you must log as user and not root. Then we tested all the other window manageers which were found to be functioning except from KDE which freezed the system when it came to Initializing Peripherals. After exhaustive googling it seemed that the problem occurred because of arts. This was uninstalled and KDE would since start smoothly.

The sound-related problems though continued. Everytime a sound was played the system froze requiring hard rebooting. On top of that, disabling the sound system from the KDE Control Center revealed that when a video was played, the application (Xine, Gxine or Noatun) would crash after a few seconds. We decided to recompile the 2.4.29 kernel throwing anything that is not needed out, installing some features like ACPI and Firewire and look at the sound issues later. Using the new kernel, the video freezing bug was remedied but the sound was still freezing the system. On top of that, the ethernet card was not functioning. After a few trial and error attempts we figured out that this was caused because the new kernel enabled Sony Vaio Programmable I/O Control Device support. So this went out of the window and we got eth0 back.

The sole problem (for now of course!) is configuring the alsa drivers from the beginning in order to make the sound work. It is our next goal and then maybe a 2.6.x kernel wouldn’t be a bad idea (that’s for the ones who thought about it!).

Conclusions: there is NO system where you cannot install Linux one way or the other. Try doing the above with XP…

Many thanks to Marc Herbert for his great how-to on installing GRUB in XP.

Ho! Ho! Ho!

Open Source is coming to town!

Just take a look at the savings of a school using Open Source compared to what it would have payed if it used MS products!

Schools save with Open Source

That’s a nice present for the educational system economy…But I guess some contracts are more powerfull than a few more computers educating students.
Have you forgotten the contract between Microsoft and the Greek Government ?
Just take a look at all these wonderfull things the Greek Government gains!

  • Instant access to source code for the most current versions, beta releases and service packs of Windows 2000, Windows XP, Windows Server 2003 and Windows CE.
  • WHO is going to take a look at the source from the Greek Government ? The ministers ? for WHAT ? auditing ???

  • Expansive disclosure of technical information for the engineering-level understanding of Windows architecture
  • Now THAT’s usefull. Learn how a buggy system works. An excellent education plan. Learn from other people’s mistakes.

  • Enhanced ability to conduct security and privacy audits and to design, build and maintain secure computing environments
  • Oh ok..now I feel secure. Our government conducts audits to maintain “secure computing environments”…wow! I guess that could not happen on any other platform..right ?

  • Opportunities for visits by government representatives to Microsoft development facilities in Redmond, Washington
  • Yihaaa!!! Let’s travel to Redmond! Free tickets for the ministers! And their families ? Their little children ? won’t they play with uncle Bill ? …who cares about the rest of the citizens ?

    enough. Get a life and start working for your citizens than your already full pockets.

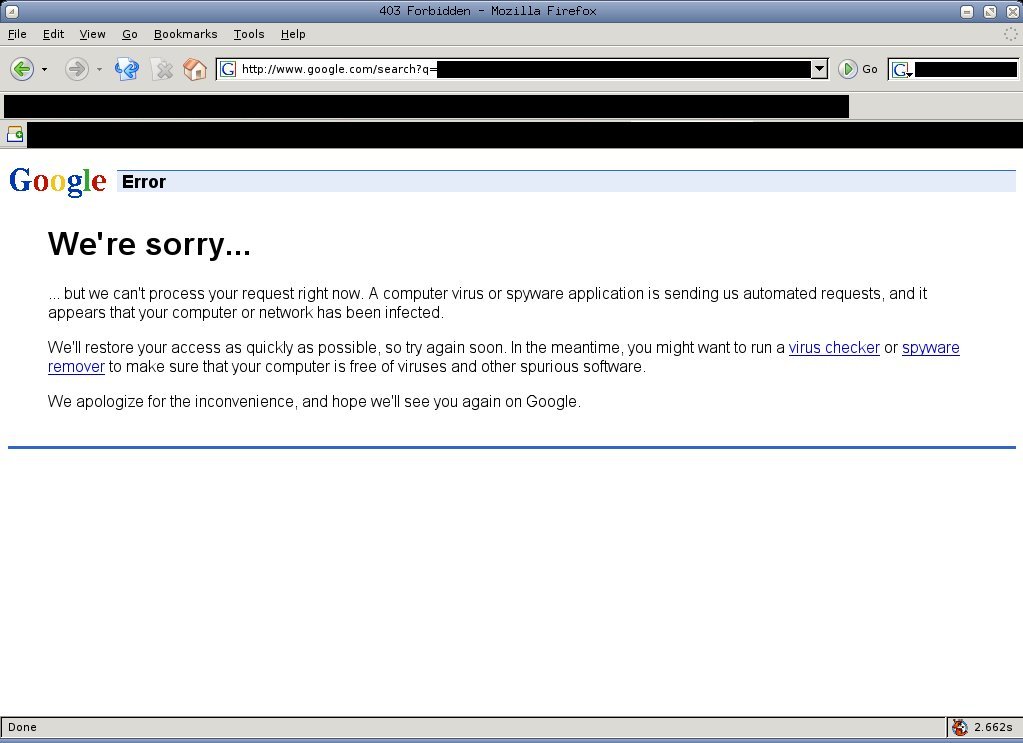
    Google messed up ?

    It’s the first time I see such a message 🙂

    Warcraft 3 on linux

    I’ve finally managed to play warcraft 3 on linux with pretty decent perfomance…

    First of all install the game using Cedega. Read this one more time…I’ve said C E D E G A. NOT wine.

    After installing using your registration keys, go find a nice no-cd crack from www.gamecopyworld.com. Install that too and you are set. If you have problems patching warcraft to it’s latest version use a symlink from the cedega c_drive c:\Program Files\Warcraft III to the cedega c_drive c:\war3\.

    This small script will make your life a bit easier too:

    #!/bin/sh
    # edit the next path
    pushd /PATH/TO/CEDEGA/c_drive/war3
    #cedega war3.exe -opengl
    #cedega w3l.exe -opengl
    popd

    UNCOMMENT 1 of the 2 cedega lines. The first one is for use with Warcraft III The Frozen Throne and the second one if you use a loader for pvpgn (read below). You HAVE to uncomment one of those 2 lines, OK ??

    If you want to be able to play with friends on your own battle.net server, set up a pvpgn server somewhere and use a pvpgn loader to start warcraft. If you don’t use a pvpgn loader you WILL get an error about being “unable to connect”.
    Last but not least, add these 2 lines to your /etc/hosts:

    X.Y.Z.W uswest.battle.net
    X.Y.Z.W Europe.battle.net

    Where X.Y.Z.W is the ip of your pvpgn server. Have fun!

    no progress…

    Since gcc 3.4 was marked stable on gentoo, I emerged it and even did an emerge -e world. It took me some time because there were more than 600 packages to rebuild. Anyway, mplayer still denies to work with some videos using -vo xv even after the recompilation with the new gcc.
    That’s the error message:

    X11 error: BadAlloc (insufficient resources for operation)?,?% 1 0 32%

    MPlayer interrupted by signal 6 in module: vo_check_events

    I’ll keep trying…

    Btw, I read some rumours that Cisco is going to release callmanager 5 under linux. I hope that becomes a reality because the current callmanager 4.1(3) runs only on windows 2000 and there are times that the whole system freezes for no good reason, or times when IE crashes. The whole configuration of the callmanager is done through a web browser…in order to add a single device you need 10 clicky-clickies…I hope this changes too.

    ser/openser and Cisco ata 188

    I’ve recently installed a ser (SIP express router) in one of my machines (well, in fact it’s more like openser) mostly for self tutoring. The config file was quite a pain to tune. Many many options, many many modules which all look quite usefull, and you can get easily distracted from what you should be doing. Luckilly there are some HOWTO’s (but not complete) around the net.
    What I find about ser/openser VERY stupid and annoying, is that while it’s tools are mostly written in bash they have the default password that comes with the installation hardcoded inside. It would be much easier if the installation procedure asked you for a username/password instead of the defaults “ser/heslo”. Anyway…you can change them later quite easily…but it’s still annoying.
    A tool you might need is sipsak. It’s like a wrapper of some common commands a SIP administrator might frequently need.

    Installing Cisco ata 188 and making it work for ser/openser was trully easy. You have to download the latest sip image (ata_03_02_01_sip_050616_a.zip) for the ata adapter from cisco (you need a password for Cisco’s site) and upload it to your phone (instructions are inside the zip file’s readme file). Inside the zip file that contains the image and some readme’s there are a few other executables that can be used for debugging it. What’s interesting for us linux users? Cisco provides binaries for almost all those tools inside the zip! In fact I upgraded my ata from linux 🙂

    Then go to http://ip.of.ata.given.by.dhcp/dev and you get a very nice menu with quite a lot of options, and some monitors (ethernet, RTP stats) that did not exist in previous versions. Just fill in your username/password, display name and sip proxy server..and you are good to go. The device registers itself without any problems and I was able to make calls to ata 188 from/to Linphone, Kphone and Xten-Lite(both windows and Linux).

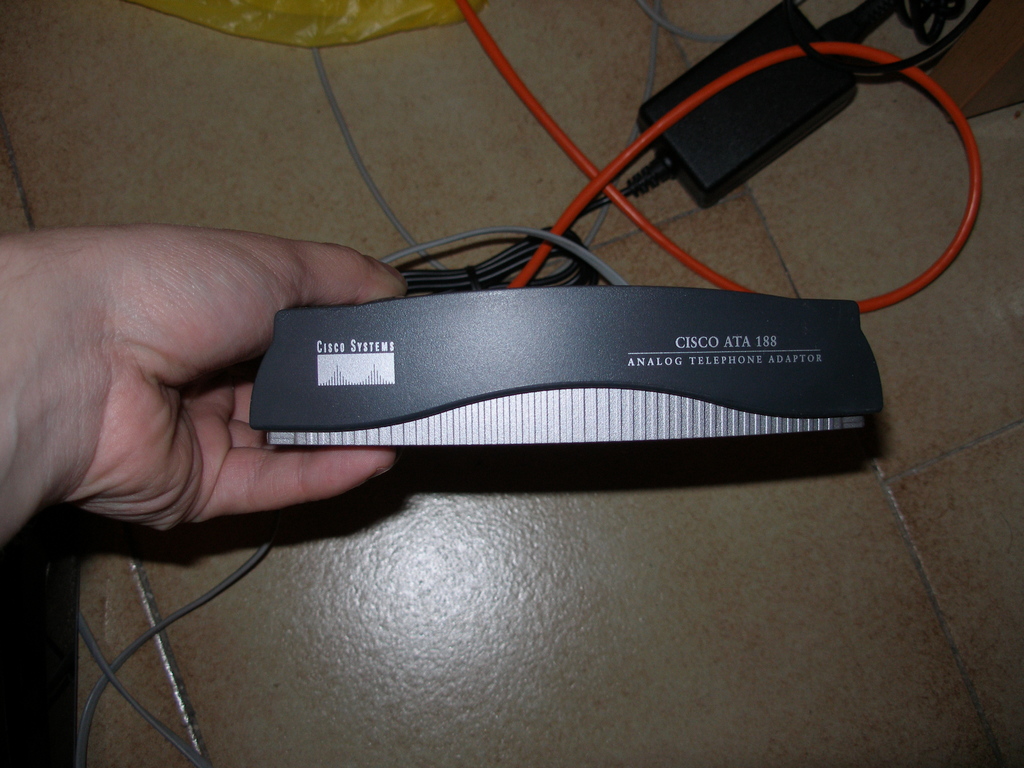
    Here’s my testing ata 188:

    cisco ata 188

    libmysqlclient.so.12 => not found

    I’ve upgraded my mysql from 4.0.X to 4.1.X…and some progs gave me errors that they could not start because they couldn’t find they proper mysql library…
    The solution is to download a mysql package called MySQL-shared-compat. Unfortunately it only comes as an rpm…but..for us gentoo users there’s a nice solution to installing it.

    Go download one of those rpms http://rpm.pbone.net/index.php3/stat/4/idpl/2144706/com/MySQL-shared-compat-4.0.25-0.i386.rpm.html and then:

    rpm2targz MySQL-shared-compat-4.0.25-0.i386.rpm
    tar zxvf MySQL-shared-compat-4.0.25-0.i386.tar.gz
    cp ./usr/lib/*.so.* /usr/lib/

    and you are done…all progs continue to work just like before.

    gentoo “broken” world file

    Yesterday, I did an “eix xpad” and I saw that there were newer versions than I had installed…That was weird because I daily do my “emerge -uDav world”. That was not the first time though such a thing had happened. So I opened my “/var/lib/portage/world” file and started checking for some of my packages that should be in there, like gimp, k3b, etc. There were just not there.
    What I did was copy the world file to the root dir and then “regenworld”. Magically around 40(!!) new packages appeared inside the world file.
    “emerge -uDav world” gave me aroung 20 packages to upgrade. Then I did an “revdep-rebuild” and my system is rocking again 🙂
    I still don’t have an explanation of why did this happen…why weren’t these packages inside the world file…possibly broken emerge commands…but why ?

    flawless fbsplash

    I’ve recently faced some problems with my fbsplash installation during a kernel upgrade. Until kernel linux-2.6.11-gentoo-r9 I had no problems at all…when I tried upgrading to linux-2.6.11-gentoo-r11 I had kernel messages all over my splash screen…

    The solution was not quite obvious…I re-read the fbsplash HOWTO and I started checking out everything it says…
    I ended up changing my lilo.conf to something that looks like this:

    image = /boot/bzImage-2611-r11
    root = /dev/hda6
    label = G2.6.11-r11
    append=”gentoo=nodevfs,video=radeonfb:ywrap,1024×768-32@85 splash=silent,fadein,theme:KillBillTux-Yellow quiet CONSOLE=/dev/tty1″
    initrd = /boot/fbsplash-killbill-1024×768
    read-only # read-only for checking

    along with a nice re-emerging of splashutils.
    Then it came to me…why have the bootsplash in the default runlevel and not on boot ? so I could get my bootsplash from the very beggining…like some modern distros like Ubuntu does.

    rc-update add splash boot

    And I thought that would be enough…wrong! Read again fool! http://gentoo-wiki.com/HOWTO_fbsplash#Adding_Background_To_All_Consoles

    As the splash script requires ‘local’ to be run first, adding splash to runlevel BOOT will force local to execute earlier, which may cause some problems, eg. when you are using some web services in local (eg. ntp)

    now what ? What if we create another “local” named local2 and put all our previous commands there ?

    cp /etc/conf.d/local.start /etc/conf.d/local2.start
    cp /etc/conf.d/local.stop /etc/conf.d/local2.stop
    cp /etc/init.d/local /etc/init.d/local2

    then edit /etc/init.d/local2 and change all occurances of local with local2
    then it’s time for:

    rc-update add local2 default

    and…drums rolling…. it works!

    collectd ebuild part2 – the rejection

    my collectd ebuild that I had posted to bugs.gentoo.org was tagged as a duplicate of http://bugs.gentoo.org/show_bug.cgi?id=107076 even though it was created after mine…anyway 🙂

    I might try to build an ebuild on something else someday 🙂

    HOWTO extract rar files with rox

    What’s easier than a single click extraction of rar files through rox ?

  • vi /usr/local/bin/urar
  • and paste inside:

    #!/bin/bash
    cd `dirname “$@”`
    unrar x -y `basename “$@”`
    mkdir “unrar done”

  • chmod +x /usr/local/bin/urar
  • then right click on a rar file…go to customize menu and drop /usr/local/bin/urar to the new window that appears.

    Now when you right click on a rar file you will see on the menu “urar”…just click it and you will have your rar files extracted to the current dir. It’s easy to modify the previous script to extract the files to a new dir if you want. It will also create a dir named “unrar done” to notify you when the process has finished.

    What needs fixing ?

  • Passworded rar files
  • some fancier method of telling us the extraction process is over instead of a mkdir…maybe with a small pygtk program to make it open a small “notice” on the current X display ?
  • collectd ebuild

    Last night I decided to create a gentoo ebuild for collectd. It’s the first ebuild I create…so bare with my errors…

    The ebuild is here: http://bugs.gentoo.org/show_bug.cgi?id=107052

    To emerge it follow these simple steps:

  • add PORTDIR_OVERLAY=”/usr/local/portage/” to your /etc/make.conf
  • mkdir -p /usr/local/portage/sys-apps/collectd/files
  • download the ebuild and put it inside /usr/local/portage/sys-apps/collectd/
  • download the rest attachments and put them inside /usr/local/portage/sys-apps/collectd/files/
  • cd /usr/local/portage/sys-apps/collectd/ ; ebuild collectd-2.1.0.ebuild digest
  • emerge collectd
  • I think the ebuild is not “stable” yet…it has only been tested on 2-3 x86 machines so I’ve added the ~x86 keyword for it…

    Feedback is more than welcome…thanks!

    collectd multiple sensor patch

    Collectd is a very nice program that runs in the background and gathers statistics about various kind of stuff like cpu load , disk activity, memory ,fan speed, temperatures, etc, and then puts them all in nice rrd files. It even has a set of scripts to create the graphs. I had only one problem though, but it was fixable.

    Collectd includes sensor.h from lm_sensor package that contains all the functions about your working temperature/fan sensors. It works fine if you only use 1 sensor. But I use 2!

    it87-isa-0290
    Adapter: ISA adapter
    CPU core: +1.78 V (min = +1.66 V, max = +1.84 V)
    DDRAM: +1.31 V (min = +1.17 V, max = +1.33 V)
    3v3 I/O: +3.22 V (min = +3.14 V, max = +3.47 V)
    +5V: +5.09 V (min = +4.76 V, max = +5.26 V)
    +12V: +12.42 V (min = +11.39 V, max = +12.61 V)
    -12V: -11.47 V (min = -7.17 V, max = -16.76 V)
    -5V: -4.03 V (min = -2.48 V, max = -10.02 V)
    Stdby: +5.09 V (min = +4.76 V, max = +5.26 V)
    CPU Fan: 4166 RPM (min = 1599 RPM, div = 4)
    BOX Fan: 1506 RPM (min = 897 RPM, div = 8 )
    IT87 T°: +37°C (low = +15°C, high = +55°C) sensor = thermistor

    lm90-i2c-0-4c
    Adapter: SMBus Via Pro adapter at 5000
    LM90 T°: +47°C (low = +15°C, high = +60°C)
    Athlon T°:
    +53.5°C (low = +15.0°C, high = +70.0°C)
    LM90 Crit: +70°C (hyst = +60°C)
    CPU Crit: +80°C (hyst = +70°C)

    As you can see I use both it87 and lm90 to get correct results. Collectd creates its rrd databases inside /var/lib/collectd. The sensor rrd file it creates are in the form:

    sensors-fan1.rrd
    sensors-fan2.rrd
    sensors-fan3.rrd
    sensors-temp1.rrd
    sensors-temp2.rrd
    sensors-temp3.rrd

    That means it can’t distinguish the different chipsets and overwrites the values if you have 2 chipsets. What I did was patch collectd to rename the rrd files in order to include the sensor name as well. I now have:

    sensors-it87-fan1.rrd
    sensors-it87-fan2.rrd
    sensors-it87-fan3.rrd
    sensors-it87-temp1.rrd
    sensors-it87-temp2.rrd
    sensors-it87-temp3.rrd
    sensors-lm90-temp1.rrd
    sensors-lm90-temp2.rrd

    The patch is here: Collectd-multi-sensor.patch.gz
    Just apply the patch inside the src dir , recompile and install.

    I am in doubt whether I should contact the author or not about this simple patch…anyway…If you use collectd and have more than 1 sensor running…tell me if it works for you…

    cheers!

    crude script for sfv checking

    Most of the times, when I download something and there’s an sfv file available I check the files against the sfv. That saves me from a lot of trouble later on…
    What I wanted though, was to have the sfv check program create a dir inside each folder it checks that would include the details from the sfv scanning. That way you can instantly know whether what you have downloaded 1 week ago is ok, or there are bad files inside, or missing files. I sometimes used to check what I downloaded against the sfv file but I forgot to move it to my “complete” folder. So I made a VERY crude script that does exactly what I want. It uses pure-sfv (which I think is a bit faster than all the others I’ve tested) and then parses the output to create a dir that looks like this:

    [ 49 OK, 0 BAD, 0 MISSING, OUT OF 49 ]

    Here’s the script…
    #!/bin/bash

    THEOLDDIR=`ls -1 | grep "MISSING, OUT OF"` ; rm -rf "$THEOLDDIR"
    ACTION=`pure-sfv *.sfv | egrep "different CRC|Tested|No such file" > check.tst`
    THEBADONES=`grep different check.tst`
    THEMISSONES=`grep "No such file" check.tst`
    LINECOUNT=`wc -l check.tst | cut -d" " -f 1`
    OKFILES=`tail -n1 check.tst | cut -d" " -f5 | cut -d"," -f1 `
    BADFILES=`tail -n1 check.tst | cut -d" " -f7 | cut -d"," -f1 `
    MISSFILES=`tail -n1 check.tst | cut -d" " -f9`
    while read line ;do
    BADIS=`echo $line | cut -d" " -f 1`
    if [ $BADIS != "Tested" ]; then
    if [ -e $BADIS ]; then
    mv $BADIS $BADIS.bad
    else
    touch $BADIS.missing
    fi
    fi
    done < check.tst
    echo "$THEBADONES"
    echo "$THEMISSONES"
    echo "$OKFILES OK, $BADFILES BAD, $MISSFILES MISSING, OUT OF $[$OKFILES+$BADFILES+$MISSFILES]"
    mkdir -p "[ $OKFILES OK, $BADFILES BAD, $MISSFILES MISSING, OUT OF $[$OKFILES+$BADFILES+$MISSFILES] ]" ; rm -f check.tst

    USE IT AT YOUR OWN RISK!!! IT MAY DELETE ALL YOUR FILES. IT WON’T BE MY FAULT!

    and yes I know the code sucks. If you don’t like it don’t use it.