Update on the state of STARTTLS support of Greek email providers

2 months ago I wrote a blog post describing the really bad state of STARTTLS support of Greek email providers. Things have slightly gotten better since then.

Updates on STARTTLS support per provider
The following is current as of 2016/03/26 and are only the updates since the previous blog post.
FORTHNET: Supports TLS 1.2 (at least since 2016/02/03)
VODAFONE: Supports TLS 1.2 for vodafone.gr but NOT for vodafone.com.gr (at least since 2016/03/10)

Updates on Certificate status per provider (that have STARTTLS support)
FORTHNET: uses a valid certificate (a wildcard *.forthnet.gr)
VODAFONE: uses a valid certificate (a wildcard *.megamailservers.eu)
MAILBOX: uses a valid signed certificate (for spamexperts.eu) (at least since 2016/03/26)

No other changes have been observed.

These updates indicate that 3 out of 5 commercial Greek ISPs currently use STARTTLS on their mail servers, OTE/COSMOTE, Forthnet and Vodafone. Way better than 1 out 5 which was the case 2 months ago. That means that the only ones left behind are Wind and Cyta, Since HOL has merged with Vodafone.

P.S. Thanks fly to @stsimb for notifying me of Forthnet updates with a comment on my blog

The sorry state of STARTTLS support of Greek email providers

I started looking into the STARTTLS support of Greek email providers completely by accident when one email of mine wasn’t being delivered for some reason to a friend who has an email address at a traditional Greek ISP. I started looking into the delivery issues by running swaks against the email server of the ISP and I just couldn’t believe it that the ISP’s mail server response did not include STARTTLS support. That made me wonder about the rest of the ISPs, so I created a very simple script that takes domains, finds their MX addresses and performs very simple TLS lookups using openssl. Yeah I know that there are websites that track the STARTTLS support of mail servers, but they usually don’t save the previous results and you can’t grep and compare.

What I’ve looked into is how emails are sent between servers (SMTP), not if users can read emails from the mail servers (POP3/IMAP) using encrypted connections.

TL;DR
The situation is BAD, REALLY BAD. Only 1,5 (yes, this is one and a half) commercial ISPs supports STARTTLS. OTE/COSMOTE has “proper” STARTTLS support while Wind has STARTTLS support only for windtools.gr domain, but not for their wind.gr.

I couldn’t believe the situation was SO, SO BAD before looking at the results. It seems that I had a lot more faith in those providers than I should have. Yeah I was wrong once again.

wtf is STARTTLS?
(please don’t read the next sentence if you know what TLS is)
If you have no idea about TLS and STARTTLS, then consider STARTTLS a way for servers to communicate and exchange data in encrypted form instead of cleartext. If mail servers don’t support STARTTLS then other servers can’t send them emails in encrypted form and everyone between those 2 servers can read the emails. It’s the equivalent of “https://” for mail servers. (There, I said it…).

TLS support per provider
The following is current as of 2016/01/23

Commercial Providers
OTE/COSMOTE: Some servers support TLS version 1.0 and some others 1.2 (more on that later)
WIND: Supports TLS version 1.0 on windtools.gr but does NOT support TLS on wind.gr (different mail servers)
CYTA: Does NOT support TLS on their mail servers
FORTHNET: Does NOT support TLS on their mail servers
HOL: Does NOT support TLS on their mail servers
VODAFONE: Does NOT support TLS on their mail servers

non-Commercial Providers
GRNET: Supports TLS 1.2
SCH: Supports TLS 1.0
TEE: Does NOT support TLS on their mail servers
MIL: Supports TLS 1.0

Universities
AUTH: Supports TLS 1.2
NTUA: Some servers support TLS 1.0 and one supports TLS 1.2
UPATRAS: Supports TLS 1.0

Free Providers
IN: Does NOT support TLS on their mail servers
FREEMAIL: Does NOT support TLS on their mail servers
MAILBOX: Supports TLS 1.2

Radical Providers
ESPIV: Supports TLS 1.2

Certificate status per provider (that have STARTTLS support)
OTE/COSMOTE: *.otenet.gr mail servers, which are the ones that support TLS 1.0, use a certificate that is valid for mailgate.otenet.gr, *.ote.gr mail servers have their own certificates, but all mail*.dt-one.com mail servers, which are the ones that use TLS 1.2, use the same self-signed certificate.
WIND: mx2.windtools.gr uses a valid certificate
GRNET: uses a valid certificate
SCH: uses a self-signed certificate (which has expired 5 years ago) signed by their own CA (which has expired 4 years ago)
MIL: uses a self-signed certificate (which has expired 1 year ago) signed by their own CA
AUTH: uses a certificate signed by their own CA called HARICA, whose certificate is now included in modern OSes, so I will consider this a valid certificate.
NTUA: all mail servers use a certificate that is valid for mail.ntua.gr
UPATRAS: uses a valid certificate
MAILBOX: uses a self-signed certificate (by plesk)
ESPIV: uses a valid certificate (a wildcard *.espiv.net)

Why does it matter
It makes a huge difference for users’ privacy. If a mail server does not support STARTTLS then anyone with the ability to look into packets traveling on the net from a source mail server to the destination mail server can read the emails in pure plaintext, as you read them on your mail client. Support of STARTTLS for a mail server forces an adversary that previously just passively monitored traffic to have to start a MITM (Man in the middle) attack in order to read those same emails. This converts the adversary from a passive to an active attacker. And this is both expensive and dangerous for the adversary, it can get caught in the act.

Security and privacy-minded people might start bashing me on my next proposal, but considering the current situation I think it’s OK for most of the users of those providers that don’t support TLS at all.
Dear providers, please install a certificate, even a self-signed one, and add support for STARTTLS on your mail servers today.

Even a self-signed certificate improves this situation. And it costs absolutely nothing. There’s really no excuse to not even have a self-signed certificate for your email server.

Self-signed vs CA-Signed
Truth is that it 99.9999% of email servers on the Internet do not verify the remote end’s certificate upon communication. That means that it makes absolutely no difference in most cases whether the certificate is CA-signed or self-signed. Most modern email servers support fingerprint verification for remote servers’ certificates but this can’t obviously scale on the Internet. If a user fears that some entity could MITM their email provider just to read their email, they already have bigger problems and certificate verification would not be able to help them a lot anyway. They either need to protect the contents of their email (gpg?) or start using alternate means of messaging/communication (pond?)

script
The script I used is on github: gr-mx. Feel free to make changes and send pull requests.
I plan to run the script once a week just to keep an archive of the results and be able to track and compare. Let’s see if something changes…

Various weirdness
* windtools.gr has 2 MX records, mx1.windtools.gr and mx2.windtools.gr. mx1.windtools.gr has been unreachable since I started running the script on 2016/01/08.
* mail{5,6,7,8}.dt-one.com mailservers used by OTE/COSMOTE did not have the self-signed certificate on 2016/01/08 while mail{1,2,3,4}.dt-one.com had it. The certificate was added at some point between 2016/01/11 and 2016/01/17

keys.void.gr – A GPG Keyserver in Greece

After some months of entertaining the idea of setting up a public gpg keyserver I finally managed to find some time and do it this weekend.

Habemus keys.void.gr Keyserver!

Some history
The first time I set up a gpg keyserver was 3 years ago. Its purpose was to make it possible for a researcher to get more results than the default on a single query from a keyserver. Using that keyserver the Greek PGP Web of Trust 2012 edition was created. After the original import of the keys, I refreshed the keys just 2 or 3 times in the following years.

The setup
The keyserver is running on Debian Linux with SKS version 1.1.5. Port 80 and 443 are being handled by nginx which acts as a reverse proxy for SKS. I originally had port 11371, the default port that gpg client uses, behind nginx as well but I had to remove it due to the following issue. I like using HSTS header for the HTTPS port, but browsers trying to access http://keys.void.gr:11371, were switching to https://keys.void.gr:11371 (because of HSTS) which couldn’t work because port 11371 does not use TLS. So once a browser visited https://keys.void.gr and got the HSTS header, every future connection towards http://keys.void.gr:11371 would fail. The solution was to use a protocol multiplexer called sslh. What this does, is that it sniffs the connections coming towards port 11371 and if it finds a TLS connection, it sends it to port 443, if it finds an HTTP connection it sends it to port 80. That way you can either visit http://keys.void.gr:11371 or https://keys.void.gr:11371 and they both work.

For ports 80,443 the connection path looks like: client -> nginx -> sks
For port 11317 the connection path looks like: client -> sslh -> nginx -> sks

keys.void.gr is available in both IPv4 and IPv6.

I’ve also setup an onion/hidden service for the keyserver, so if you prefer visiting the onion address, here it is: wooprzddebtxfhnq.onion (available on port 11371 as well).

Difficulties
I’m not sure if it’s the Debian package’s fault or I did something stupid, but if you plan on running your own keyserver be very careful with permissions on the your filesystem. sks errors are not very friendly. Make sure that /var/spool/sks, /var/lib/sks and /var/log/sks are all owned by debian-sks:debian-sks.
# chown -R debian-sks:debian-sks /var/spool/sks /var/lib/sks /var/log/sks
Don’t run the DB building script as root, run it as debian-sks user:
# sudo -u debian-sks /usr/lib/sks/sks_build.sh
There are a quite some tunables referenced in the sks man page regarding pagesizes, I went with the default options for now.

The pool
To enter the pool of keyservers and start interacting with other keyservers you have to join the sks-devel mailing list and announce your server existence by sending your “membership line” which looks like this:
keys.void.gr 11370 # George K. <keyserver [don't spam me] void [a dot goes here] gr> #0x721006E470459C9C

If people place this line in their membership config file and you place theirs, then the keyservers start communicating, or “gossiping” as it is called in the sks language. It needs to be mutual.

Because of the minimal traffic I was seeing on the mailing list archives I thought that finding peers would take weeks, if not months. I was very very wrong. I got 6 replies to my email in less than 2 hours. Impressive. Thanks a lot people!

UI
I’ve taken the boostrap-ed HTML from https://github.com/mattrude/pgpkeyserver-lite.

TODO
hkps support will be added in the following days or weeks.

Stats
keys.void.gr Keyserver statistics
sks-keyservers.net pool Status for keys.void.gr

Enjoy!

Κατάργηση ηλεκτρονικών ψηφοφοριών και ψηφιακός αναλφαβητισμός

Στις 08/05/2015 στην βουλή σχολιάστηκαν οι ηλεκτρονικές ψηφοφορίες των πρυτανικών συμβουλίων και ουσιαστικά ο Πρωθυπουργός κ. Τσίπρας υπερασπίστηκε την κατάργησή τους. Το κύριο πρόβλημα (μου) με το παραπάνω είναι οι λόγοι που ισχυρίστηκε η κυβέρνηση πως προχωρά σε κάτι τέτοιο.

Πριν σχολιάσω παραπέρα να δηλώσω πως είμαι από τους ελάχιστους, όταν γινόταν οι ηλεκτρονικές ψηφοφορίες των πρυτανικών ήμασταν 4 άτομα τώρα είμαστε λίγοι παραπάνω, που έχουν πρόσβαση στους servers στους οποίους διεξάγονται οι ηλεκτρονικές αυτές ψηφοφορίες. Δεν έχω γράψει ούτε μια γραμμή κώδικα για το software που τρέχει τις “εκλογές”, αλλά είμαι διαχειριστής των μηχανημάτων, των servers. Η ομάδα στην οποία ανήκω στήνει το λειτουργικό του server, το software που θα τρέξει στο server, συμβουλεύει τους developers για αλλαγές που πρέπει να γίνουν σε θέματα απόδοσης του software, προστατεύει τον server από επιθέσεις, κτλ. System Administrator που λένε και στο χωριό μου, με ολίγο από system engineer και security engineer.

Πριν σχολιάσω τα λόγια του Π/Θ αντιγράφω από τα πρακτικά της Βουλής για τις 08/05/2015 τα ακριβή λόγια της ερώτησης από τον κ. Θεοδωράκη και έπειτα του κ. Τσίπρα, γιατί στα περισσότερα sites είναι σχετικά διαστρεβλωμένα:

Θεοδωράκης

Έχουμε την πρόθεση να καταργηθεί η ηλεκτρονική ψηφοφορία. Υπάρχουν άνθρωποι στον ΣΥΡΙΖΑ –ευτυχώς λίγοι- που μιλούν για τεχνοφασισμό. Είναι τεχνοφασισμός σήμερα η ηλεκτρονική ψηφοφορία; Πού θα επιστρέψουμε, στα περιστέρια, που είναι και λίγο πιο γραφικό;

Τσίπρας

Έρχομαι στο θέμα της ηλεκτρονικής ψηφοφορίας. Μιλήσατε για την ηλεκτρονική ψηφοφορία και είπατε ότι αυτή διασφαλίζει τη μαζική συμμετοχή.
Είμαι υπέρμαχος της άποψης ότι η χρήση τεχνολογίας πρέπει να γίνει συμβατή με την καθημερινότητα μας. Εάν όμως έχουμε την αντίληψη ότι η ηλεκτρονική ψηφοφορία διασφαλίζει τη συμμετοχή, γιατί δεν την προτείνουμε; Να αντικαταστήσουμε τις εκλογές, να μην κουράζεται ο κόσμος να πηγαίνει στα παραβάν να ψηφίζει, να καταργήσουμε και την ζώσα διαδικασία μέσα στο Κοινοβούλιο και να ψηφίζουμε όλοι από το laptop μας, από τα γραφεία μας.

Εδώ, λοιπόν, πρέπει να βάλουμε κάποιες διαχωριστικές γραμμές. Τόσο καιρό η ψηφοφορία στα πανεπιστήμια γινόταν με τον παραδοσιακό τρόπο. Η μαζικότητα, όχι σε ό,τι αφορά τους φοιτητές, αλλά σε ό,τι αφορά τα μέλη ΔΕΠ ήταν διασφαλισμένη. Ήταν διασφαλισμένη η μαζικότητα. Δεν υπήρχε κανένα θέμα μαζικότητας.

Αυτό που άλλαξε με την ηλεκτρονική ψηφοφορία και ο λόγος που την καταργούμε είναι ο εξής: Με την ηλεκτρονική ψηφοφορία η πραγματική εφορευτική επιτροπή δεν είναι αυτοί που συλλέγουν τα e-mails και αθροίζουν τις ψήφους, είναι ένας server, τον οποίο κανείς μη μυημένος δεν μπορεί να ελέγξει. Επομένως, το αδιάβλητο δεν διασφαλίζεται. Όμως, το ακόμη χειρότερο, κρισιμότερο και ουσιαστικότερο είναι ότι δεν διασφαλίζεται η μυστικότητα. Τα ηλεκτρονικά ίχνη και η προσωπική επιλογή του καθενός είναι εκεί, στη διάθεση του κάθε ενδιαφερόμενου.

(Δεν βρήκα πουθενά στα πρακτικά που/αν στην ερώτηση αναφέρθηκαν τα περί “μαζικής συμμετοχής”…αλλά έστω)

Τα παραπάνω τα είπε ένας νεότατος άνθρωπος που υποτίθεται πως έχει και σχέση με την τεχνολογία, δεν τα είπε ο Ζολώτας ούτε ο Κωνσταντίνος Καραμανλής, τα είπε ο κ. Τσίπρας.

Ας τα πάρουμε κομμάτι κομμάτι.

Καταρχήν είναι παράλογη η σύγκριση της συζήτησης που εξελίσσεται κατά την κοινοβουλευτική διαδικασία με την ψήφο την ίδια. Μήλα με πορτοκάλια. Τι σχέση έχει το ένα με το άλλο; Μπορεί κανείς να συζητά όσες ώρες θέλει, να ακούει όλες τις απόψεις και να ψηφίζει έπειτα ηλεκτρονικά. Είναι καλύτερα να ψηφίζουν διά ανατάσεως χειρός ή δια βοής δηλαδή; Όσες φορές και αν διαβάσω το συγκεκριμένο απόσπασμα της ομιλίας μου φαίνεται τελείως παράλογο.

Έπειτα να δούμε γιατί ήρθαν οι ηλεκτρονικές ψηφοφορίες και τι κρύβεται πίσω από τις λέξεις “μαζική συμμετοχή” της ερώτησης(;) στην οποία απαντά ο κ. Τσίπρας. Οι ηλεκτρονικές ψηφοφορίες ήταν μια εναλλακτική μέθοδος εκλογής των πρυτανικών συμβουλίων σε περίπτωση που οι παραδοσιακές μέθοδοι “δεν λειτουργούσαν”. Ας δούμε τι λέει το ΦΕΚ 2564 – 21/09/2012

Η παρούσα απόφαση ρυθμίζει τον τρόπο οργάνωσης και διεξαγωγής της εκλογικής διαδικασίας ανάδειξης των εσωτερικών μελών του Συμβουλίου και του Πρύτανη των Α.Ε.Ι. μέσω ηλεκτρονικής και επιστολικής ψήφου σύμφωνα με το άρθρο 8 του ν. 4009/2011 (Α ́ 195), όπως τροποποιήθηκε με τον ν. 4076/2012 (Α ́ 159), στην περίπτωση δύο διαδοχικών άγονων εκλογικών διαδικασιών

Οπότε για να πάει ένα ΑΕΙ σε ηλεκτρονικές ψηφοφορίες σημαίνει πως ήδη ο παραδοσιακός τρόπος ψηφοφορίας _δεν_ δουλεύει. Γιατί δεν δουλεύει όμως; Τι μπορεί να κάνει μια παραδοσιακή εκλογή άγονη; Στο δικό μου μυαλό ισχύουν τα εξής:

  1. να μην πάει κανείς να ψηφίσει
    • A) γιατί δεν θέλουν
      B) γιατί δεν τους αφήνουν
  2. δεν έχει οργανωθεί σωστά η ψηφοφορία
    • A) δεν υπάρχουν κάλπες
      Β) προβλήματα με την εφορευτική επιτροπή

Το πρόβλημα δεν είναι προφανώς η περίπτωση 1A, αλλά όλες οι υπόλοιπες, στις οποίες θέλει κάποιος να ψηφίσει και δεν μπορεί.

Και πάλι όμως όποιος μένει σε αυτά χάνει το δάσος. Το πρόβλημα εξαρχής δεν ήταν ο τρόπος διεξαγωγής των εκλογών των πρυτανικών συμβουλίων, αλλά το γεγονός πως δεν ήθελε μια μερίδα του κόσμου τα πρυτανικά συμβούλια τα ίδια. Αυτή ήταν η γνώμη τους και την υποστήριζαν με όποιο τρόπο μπορούσαν. Οπότε η τότε κυβέρνηση έκανε ντρίπλα, ξέροντας πως τις κανονικές εκλογές μπορεί κανείς εύκολα να τις σταματήσει, αλλά δεν μπορεί να σταματήσει το ίδιο εύκολα τις ηλεκτρονικές. Έτσι συνέβη το εξής ενδιαφέρον, αυτοί που δεν ήθελαν τα πρυτανικά συμβούλια για τους Χ,Υ,Ζ λόγους, δίκαιους ή άδικους μικρή σημασία έχει για αυτό το κείμενο, αντί να συνεχίσουν να προσπαθούν να υπερασπιστούν την γνώμη τους με επιχειρήματα ενάντια στα πρυτανικά συμβούλια, βρέθηκαν ξαφνικά σε ένα εντελώς διαφορετικό γήπεδο, αυτό των ηλεκτρονικών ψηφοφοριών, και προσπαθούσαν να βρουν επιχειρήματα πλέον για να μην λειτουργήσουν οι ηλεκτρονικές ψηφοφορίες και όχι τα πρυτανικά συμβούλια.

Η ντρίπλα της τότε κυβέρνησης ήταν εμπνευσμένη από κίνηση του Magic Johnson…πέρασε την μπάλα κάτω από τα πόδια του αντιπάλου ο οποίος έμεινε να κοιτάει το άδειο γήπεδο όσο αυτή κάρφωνε.

Οπότε η σημερινή κυβέρνηση θυμάται ακόμα αυτό το….κάρφωμα και πονάει. Δεν αρκείται στην κατάργηση των πρυτανικών συμβουλίων αλλά καταργεί και τις ηλεκτρονικές ψηφοφορίες γενικά. Πονάει χέρι, κόψει…κεφάλι.

Ο παραλογισμός όμως αρχίζει στο δεύτερο σκέλος της απάντησης του κ. Τσίπρα σχετικά με την εφορευτική επιτροπή και τον “server”. Εκεί φαίνεται η τεχνοφοβία και η ένδεια των συμβούλων του περί τεχνολογικών θεμάτων. Γιατί αν είχαν κάτσει να μελετήσουν σοβαρά το ζήτημα, ή αν είχαν ρωτήσει κάποιον σχετικό ερευνητή (όχι κάποιον που ξέρει από γκομπιούτερ, κάποιον ερευνητή γράφω), θα είχαν ίσως βρει πατήματα για να έχουν ενστάσεις για τον τρόπο διεξαγωγής των ηλεκτρονικών ψηφοφοριών, αλλά ΣΙΓΟΥΡΑ δεν είναι αυτά τα σοφίσματα που αναφέρουν.

Το πλέον εξοργιστικό με την κριτική κατά του συστήματος ηλεκτρονικών ψηφοφοριών, Zeus όπως είναι το “project name” του, είναι πως κανείς δεν έχει διαβάσει ποτέ το πως ακριβώς δουλεύει το σύστημα αυτό για να μπορέσει να του ασκήσει σοβαρή κριτική. Μονίμως η κριτική γίνεται πάνω στο πως φαντάζεται κάποιος πως δουλεύει το Zeus. Γι’ αυτό και οι αυθαίρετες ερμηνείες όπως: “ο server τα βλέπει όλα”, “αυτοί έχουν τα κλειδιά και κάνουν ό,τι θέλουν”, “ξέρουν ποιος ψηφίζει και πότε”, κτλ, κτλ. είναι τόσο λάθος. Και δεν χρειάζεται ιδιαίτερος κόπος για να μάθει κανείς γιατί τα παραπάνω είναι όλα λάθος υποθέσεις, αρκεί να διαβάσει το εγχειρίδιο χρήσης και 1-2 σχετικά paper.

Ο “server” λοιπόν, τρέχει ένα λογισμικό ανοιχτού κώδικα το οποίο υλοποιεί μαθηματικούς αλγορίθμους για να εξασφαλίσει την εγκυρότητα της ψήφου, των αποτελεσμάτων και του αδιάβλητου της διαδικασίας. Όλα αυτά φυσικά γίνονται χρησιμοποιώντας κρυπτογραφία (δηλαδή μαθηματικά). Δεν γνωρίζει κανείς τι ψήφισε κάποιος, ούτε αυτοί που έγραψαν το software, ούτε εμείς που διαχειριζόμαστε το server, ούτε η εφορευτική επιτροπή. Και όλα αυτά μπορεί κάποιος να τα αποδείξει μαθηματικά.

“Αδύνατον να συμβαίνει κάτι τέτοιο” θα σκούξουν κάποιοι…έλα όμως πως είναι δυνατόν κάτι τέτοιο όντως να συμβαίνει. Πως να πείσεις τώρα πως δεν είσαι ελέφαντας και πως όλα αυτά είναι πραγματικότητα; Ο κόσμος προοδεύει, αποδεχτείτε το.

Δεν θα γράψω τίποτα το τεχνικό για το πως δουλεύουν όλα αυτά, υπάρχουν αναλυτικά στο site του Zeus άλλωστε, αλλά θα σταθώ στην φράση “τον οποίο κανείς μη μυημένος δεν μπορεί να ελέγξει”. Δηλαδή μας λένε πως επειδή η πλειοψηφία του κόσμου αδυνατεί να κατανοήσει τα μαθηματικά αυτά, να μην τα χρησιμοποιήσουμε. Βάζω στοίχημα πως οι περισσότεροι δεν ξέρουν πως λειτουργεί ένας κινητήρας εσωτερικής καύσης αλλά οδηγούν αυτοκίνητο, ούτε τι κάνει ένα αεροπλάνο να πετάει αλλά το χρησιμοποιούν για τα ταξίδια τους. Οι περισσότεροι χρησιμοποιούν υπολογιστή και Internet κάθε μέρα, αλλά δεν έχουν την παραμικρή ιδέα πως και η ασφάλεια στο Internet βασίζεται ακριβώς στα ίδια μαθηματικά. Γιατί να μην καταργήσουμε και το Internet στην Ελλάδα λοιπόν αφού οι μη μυημένοι δεν καταλαβαίνουν πως λειτουργεί; Δεν υπάρχει χειρότερη δικαιολογία από το “δεν καταλαβαίνω κάτι άρα το καταργώ”. Δεν υπάρχει μεγαλύτερος σκοταδισμός από αυτό. Πραγματικός μεσαίωνας. Αντί για μάγισσες καίμε software, αυτή είναι η μόνη διαφορά. Δεν έχουν που δεν έχουν τα πανεπιστήμια πρόσβαση σε διεθνείς βιβλιοθήκες πλέον, όχι δεν φταίει ο σύριζα γι’ αυτό, φταίνε οι προηγούμενοι, σε λίγο θα πρέπει να ξεχάσουμε και όσα έχουμε ήδη μάθει.

Δεν μπορώ με τίποτα να αποδεχτώ πως ο κ. Τσίπρας, απόφοιτος πολυτεχνείου, πιστεύει όντως αυτό που είπε. Θεωρώ πως το εσωκομματικό του ακροατήριο τον πίεσε να εκδικηθούν για τα πρυτανικά συμβούλια (εεε σόρρυ, τις ηλεκτρονικές ψηφοφορίες) και βρήκαν οι σύμβουλοί του μια (τραγική) δικαιολογία που θα την καταπιούν αμάσητη και οι υπόλοιποι πολιτικοί, γιατί πάσχουν και αυτοί από την ίδια ασθένεια, την τεχνοφοβία, και τα media, γιατί και αυτά έχουν παντελή άγνοια της ψηφιακής πραγματικότητας. Γνωρίζω πως υπάρχουν άνθρωποι στο σύριζα που έχουν τεκμηριωμένες απόψεις για τεχνολογικά ζητήματα, προφανώς κανείς δεν τους πλησίασε και κανείς δεν ζήτησε την γνώμη τους. Αυτό είναι και ένα μεγάλο ζήτημα εδώ, να υπάρχει κόσμος που να είναι τεχνολογικά καταρτισμένος, μυημένος όπως είπε ο κ. Τσίπρας, αλλά οι κομματικοί οργανισμοί να τους αγνοούν πλήρως και να φτάνουν έτσι σε σκοταδιστικά συμπεράσματα.

Αν κάποιος θέλει, μπορεί να πάρει τις (ψηφιακά υπογεγραμμένες) ψήφους και να ξανατρέξει δικούς του αλγορίθμους για να επαληθεύσει όλα τα παλιά αποτελέσματα. Είναι τόσο απλό. Ας το κάνουν, και αν βρουν εσκεμμένα λάθη ας μιλήσουν όσο θέλουν για το διαβλητό ή μη της διαδικασίας. Αλλά κανείς δεν πρόκειται να μπει σε μια τέτοια διαδικασία, γιατί αυτό θέλει κόπο ενώ το να αραδιάζει κανείς σοφίσματα είναι εύκολο.

Και πάμε στο τελευταίο κομμάτι της δήλωσης, που είναι ακόμα πιο προβληματικό από τα προηγούμενα. Εδώ γίνεται νύξη περί του διαβλητού της μυστικότητας. Ποια είναι τα _ακριβή_ ηλεκτρονικά ίχνη στα οποία γίνεται αναφορά; 99% εννοούν την IP του χρήστη κατά την ψηφοφορία…η οποία όμως στο σύστημα Zeus δεν κρατιέται πουθενά μαζί με την ψήφο, ακριβώς για να διασφαλίζεται η μυστικότητα. Για εσένα που σκέφτεσαι πονηρά όσο διαβάζεις αυτό το κείμενο, ούτε το όνομα του κρατιέται, κανένα στοιχείο που μπορεί να συνδυάσει ψήφο με άνθρωπο δεν κρατιέται από το σύστημα. Και πάλι δεν θα κάτσω να αναλύσω πως ακριβώς δουλεύει το Zeus, αλλά είναι προφανές πως το άτομο το οποίο πληροφόρησε τον κ. Τσίπρα είναι στην καλύτερη των περιπτώσεων ημιμαθές (αλλά με μεγάλες άκρες). Θα μπορούσε κάλλιστα ο καθένας να έμπαινε να ψηφίσει μέσω Tor, από το σπίτι του γείτονα, από ένα netcafe, από οπουδήποτε. Δεν έχει καμία σημασία η IP από την οποία μπαίνει κανείς. Η ίδια η ψήφος είναι κρυπτογραφημένη από τον υπολογιστή του χρήστη (browser) πριν φτάσει στο Zeus…αλλά άρχισα τα τεχνικά και ξεφεύγω χωρίς λόγο. Το αδιάβλητο της διαδικασίας και η τήρηση της μυστικότητας είναι ακρογωνιαίος λίθος κάθε σύγχρονου συστήματος ηλεκτρονικής ψηφοφορίας, όχι μόνο του Zeus. Οι ηλεκτρονικές ψηφοφορίες δεν είναι συστήματα που αντί για χαρτί και παραβάν έχεις ένα υπολογιστή, είναι πολύ μα πολύ πιο σύνθετες διαδικασίες, είναι κομμάτι της επιστήμης των μαθηματικών. Αν κάποιου το μυαλό δεν χωράει αυτή την πρόοδο, ας στρωθεί στο διάβασμα.

Αλλά η δήλωση έχει μέσα της άλλο ένα παραλογισμό. Αφού δεν αρέσει καν η υποψία της τήρησης ηλεκτρονικών ιχνών στις ψηφοφορίες, γιατί το κράτος υποχρεώνει τους ISPs να κρατάνε τα δεδομένα σύνδεσης των χρηστών στο Internet για 1 χρόνο; Γιατί υπάρχει καταγραφή των μεταδεδομένων των τηλεφωνικών κλήσεων, ποιος κάλεσε ποιον, τι ώρα, ποια ήταν η διάρκεια της κλήσης, και από που (αν μιλάμε για κινητή τηλεφωνία) για 1 χρόνο; Αυτά δεν είναι ηλεκτρονικά ίχνη γεμάτα με προσωπικές επιλογές του καθενός; Αν δεν αρέσουν τα ηλεκτρονικά ίχνη, και εγώ είμαι σίγουρα ένας από αυτούς που δεν του αρέσουν, καταργήστε τα παντού. Σίγουρα θα έχετε και την δική μου στήριξη σε κάτι τέτοιο.

Τα ηλεκτρονικά ίχνη (IP) τα οποία υπονοήθηκε πως συνδυάζονται με την ψήφο, ενώ διασφαλίζεται με διάφορες μεθόδους του Zeus πως δεν γίνεται αυτό, δεν πρέπει να κρατιούνται κατά την λογική της κυβέρνησης, ενώ τα ψηφιακά ίχνη που συνδυάζονται με όλες τις υπόλοιπες δραστηριότητες των ανθρώπων στον ψηφιακό κόσμο ας κρατιούνται (και δεν μας πειράζει – αφού δεν τα σχολιάζουμε). Τι είδους λογική είναι αυτή;

Επίσης το “στη διάθεση του κάθε ενδιαφερόμενου” της δήλωσης τι υπονοεί; Πως εμείς που λειτουργούμε το σύστημα μοιράζουμε τα δεδομένα σε “κάθε ενδιαφερόμενο”; Αν ναι, αυτό είναι σοβαρή κατηγορία, και θα το πάρω και προσωπικά. Αν έχει κάποιος αποδείξεις ας πάει στα δικαστήρια. Αλλιώς να σταματήσει εδώ και τώρα τα σοφίσματα (για να μην πω τίποτα χειρότερο…). Αν έβγαινα εγώ να κάνω δηλώσεις και να υπαινίσσομαι πράγματα για το διαβλητό της διαδικασίας σε ψηφοφορίες στην Βουλή χωρίς κανένα στοιχείο θα με πήγαιναν στα δικαστήρια ή όχι;

Τέλος, νομίζω αξίζει να αναφέρω ένα ωραίο feature του Zeus που σχετίζεται με αυτό που η αρχική ερώτηση αναφέρει με τις λέξεις “μαζική συμμετοχή” (ενώ στην πραγματικότητα εννοεί κάτι άλλο).
Επειδή υπήρχε στον αέρα η “φήμη” πως με τις παραδοσιακές μεθόδους ψηφοφορίας κάποια μέλη ΔΕΠ έπαιρναν από το χεράκι άλλα μέλη ΔΕΠ, τους έδιναν “σταυρωμένα ψηφοδέλτια” και τους επέβλεπαν την ώρα που ψήφιζαν, το Zeus έχει ένα πολύ ωραίο feature. Μπορεί κάποιος να αλλάξει την ψήφο του όσες φορές θέλει μέχρι να κλείσει η διαδικασία της ψηφοφορίας. Άρα και να σε αναγκάσει κάποιος να ψηφίσεις κάτι με το ζόρι ή να αλλάξεις την ψήφο σου σε μια δεδομένη χρονική στιγμή, ακόμα και αν σε απειλήσει με οποιονδήποτε τρόπο, έχεις την δυνατότητα να την αλλάξεις και πάλι σε αυτό που εσύ θέλεις μόλις αυτός πάψει να σε απειλεί. Και είναι αδύνατον αυτός που απειλεί κάποιον για να αλλάξει την ψήφο του να μπορεί να απειλεί όλο το εκλογικό σώμα ταυτόχρονα μέχρι την λήξη της ψηφοφορίας. Στις παραδοσιακές μεθόδους ψηφοφορίας που δεν μπορείς να αλλάξεις την ψήφο σου, ο εκβιαστής μπορεί να απειλήσει έναν έναν όσους ψηφίζουν την ώρα της ψηφοφορίας και η ψήφος που τελικά θα καταμετρηθεί θα είναι αυτή που έχει έρθει μέσω εκβιασμού και όχι αυτή που ήθελε ο ψηφοφόρος. Γι’ αυτό και μόνο το λόγο θα έπρεπε οι (ηλεκτρονικές) ψηφοφορίες που γίνονται με συστήματα τύπου Zeus να προτιμώνται σε σχέση με τις παραδοσιακές.

Υπάρχει [εδώ] ένα blog post που περιέχει ένα email από τον τότε Αντιπρύτανη του Πανεπιστημίου Κρήτης κ. Τζανάκη που χρησιμοποιεί επιχειρήματα παρόμοια με αυτά που χρησιμοποίησε ο κ. Τσίπρας στην δική του απάντηση. Ημιμάθεια, ψηφιακός αναλφαβητισμός και σκοταδισμός. Και αυτά είναι λόγια αντιπρύτανη…όχι κάποιου τυχαίου.

Θέλουν να καταργήσουν τα πρυτανικά συμβούλια; Θεωρούν πως έχουν κάποια καλύτερη ιδέα για την λειτουργία των πανεπιστημίων; Ας το κάνουν. Θα κριθούν εκ του αποτελέσματος όπως κρίθηκαν και οι προηγούμενοι. Αλλά οι δικαιολογίες που έδωσαν για την κατάργηση των ηλεκτρονικών ψηφοφοριών δεν στέκουν με τίποτα. Και τους κάνουν να φαίνονται ψηφιακά αναλφάβητοι και ημιμαθείς. Το να χρησιμοποιεί κανείς ψευδο-τεχνολογικές δικαιολογίες σίγουρα δεν είναι σοβαρή πολιτική πάντως.

Χαρακτηριστικό του φασισμού είναι η αποστροφή προς την γνώση και τις επιστήμες. Αν λοιπόν με την ίδια αποστροφή αντιμετωπίζει και η σημερινή κυβέρνηση τις ηλεκτρονικές ψηφοφορίες, επειδή δεν είναι “μυημένη”, ποιος τελικά επιβάλει τον (τεχνο)φασισμό;

Έχω τρέξει δεκάδες άλλα προγράμματα/projects όσο εργάζομαι στο grnet και το Zeus ήταν ένα από αυτά που μας προκάλεσαν τους λιγότερους πονοκεφάλους ως software. Ίσως τους περισσότερους στην επικοινωνία με τρίτους ανθρώπους, αλλά γι’ αυτό φυσικά δεν φταίει η ομάδα ανάπτυξης του software. Προσωπικά θεωρώ αρκετά σημαντικό το γεγονός πως από την δουλειά που έγινε βγήκαν papers (πχ “From Helios to Zeus“) και αναγνωρίστηκε η αξία του software σε Ελλάδα και Εξωτερικό. Ακόμα ένα ενδιαφέρον σημείο είναι πως το Zeus χρησιμοποιήθηκε από διάφορους ιδιωτικούς συλλόγους τα τελευταία 2 χρόνια για να κάνουν τις εκλογές τους, έτσι το δημόσιο είχε μέχρι και έσοδα(!) από το Zeus. Γιατί δεν υπάρχει μάλλον, τουλάχιστον ακόμα, κανείς άλλος στην αγορά της πληροφορικής που να μπορεί να φτιάξει και να τρέξει ένα παρόμοιο σύστημα το ίδιο αξιόπιστα. Ε τώρα βέβαια όλο και κάποιος θα βρεθεί να καλύψει το κενό…

Αν κάποιος έχει το email του κ. Τσίπρα ας του στείλει το εγχειρίδιο χρήσης ψηφοφόρου για το Zeus, ίσως το ξανασκεφτεί και δεν μας ρίξει στα ψηφιακά τάρταρα.

Υ.Γ. Προφανώς το παραπάνω post είναι καθαρά προσωπικό (όπως και τα υπόλοιπα στο blog αυτό) και δεν αντιπροσωπεύει ούτε τις απόψεις των υπολοίπων συναδέλφων που δούλεψαν/δουλεύουν στο Zeus ούτε της εταιρίας φυσικά. Θα έπρεπε να εννοούνται αυτά, αλλά ποιος ξέρει τι μπορεί να σκεφτεί κάποιος…

SMTP over Hidden Services with postfix

More and more privacy experts are nowdays calling people to move away from the email service provider giants (gmail, yahoo!, microsoft, etc) and are urging people to set up their own email services, to “decentralize”. This brings up many many other issues though, and one of which is that if only a small group people use a certain email server, even if they use TLS, it’s relatively easy for someone passively monitoring (email) traffic to correlate who (from some server) is communicating with whom (from another server). Even if the connection and the content is protected by TLS and GPG respectively, some people might feel uncomfortable if a third party knew that they are actually communicating (well these people better not use email, but let’s not get carried away).

This post is about sending SMTP traffic between two servers on the Internet over Tor, that is without someone being able to easily see who is sending what to whom. IMHO, it can be helpful in some situations to certain groups of people.

There are numerous posts on the Internet about how you can Torify all the SMTP connections of a postfix server, the problem with this approach is that most exit nodes are blacklisted by RBLs so it’s very probable that the emails sent will either not reach their target or will get marked as spam. Another approach is to create hidden services and make users send emails to each other at their hidden service domains, eg username@a2i4gzo2bmv9as3avx.onion. This is quite uncomfortable for users and it can never get adopted.

There is yet another approach though, the communication could happen over Tor hidden services that real domains are mapped to.

HOWTO
Both sides need to run a Tor client:
aptitude install tor torsocks

The setup is the following, the postmaster on the receiving side sets up a Tor Hidden Service for their SMTP service (receiver). This is easily done in his server (server-A) with the following line in the torrc:
HiddenServicePort 25 25. Let’s call this HiddenService-A (abcdefghijklmn12.onion). He then needs to notify other postmasters of this hidden service.

The postmaster on the sending side (server-B) needs to create 2 things, a torified SMTP service (sender) for postfix and a transport map that will redirect emails sent to domains of server-A to HiddenService-A.

Steps needed to be executed on server-B:
1. Create /usr/lib/postfix/smtp_tor with the following content:

#!/bin/sh

torsocks /usr/lib/postfix/smtp $@

2. Make it executable
chmod +x /usr/lib/postfix/smtp_tor

3. Edit /etc/postfix/master.cf and add a new service entry
smtptor unix - - - - - smtp_tor
For Debian Stretch and/or for postfix 2.11+ this should be:

smtptor      unix  -       -       -       -       -       smtp_tor
  -o smtp_dns_support_level=disabled

4. If you don’t already have a transport map file, create /etc/postfix/transport with content (otherwise just add the following to your transport maps file):

domain-a.net        smtptor:[abcdefghijklmn12.onion]
domain-b.com        smtptor:[bbbcccdddeeeadas.onion]

5. if you don’t already have a transport map file edit /etc/postfix/main.cf and add the following:
transport_maps = hash:/etc/postfix/transport

6. run the following:
postmap /etc/postfix/transport && service postfix reload

7. If you’re running torsocks version 2 you need to set AllowInbound 1 in /etc/tor/torsocks.conf. If you’re using torsocks version 1,you shouldn’t, no changes are necessary.

Conclusion
Well that’s about it, now every email sent from a user of server-B to username@domain-a.net will actually get sent over Tor to server-A on its HiddenService. Since HiddenServices are usually mapped on 127.0.0.1, it will bypass the usual sender restrictions. Depending on the setup of the receiver it might even evade spam detection software, so beware…If both postmasters follow the above steps then all emails sent from users of server-A to users of server-B and vice versa will be sent anonymously over Tor.

There is nothing really new in this post, but I couldn’t find any other posts describing such a setup. Since it requires both sides to actually do something for things to work, I don’t think it can ever be used widely, but it’s still yet another way to take advantage of Tor and Hidden Services.

!Open Relaying
When you setup a tor hidden service to accept connections to your SMTP server, you need to be careful that you aren’t opening your mail server up to be an open relay on the tor network. You need to very carefully inspect your configuration to see if you are allowing 127.0.0.1 connections to relay mail, and if you are, there are a couple ways to stop it.

You can tell if you are allowing 127.0.0.1 to relay mail if you have something like this in your postfix configuration by looking at the smtpd_recipient_restrictions and seeing if you have permit_mynetworks, and your mynetworks variable includes 127.0.0.1/8 (default). The tor hidden service will connect via 127.0.0.1, so if you allow that to send without authentication, you are an open relay on the tor network, and you don’t want that…

Three ways of dealing with this.

1. Remove remove 127.0.0.1 from mynetworks and use port 25/587 as usual.

2. Create a new secondary transport that has a different set of restrictions. Copy the restrictions from main.cf and remove ‘permit_mynetworks’ from them
/etc/postfix/master.cf

2525      inet  n       -       -       -       -       smtpd
   -o smtpd_recipient_restrictions=XXXXXXX
   -o smtpd_sender_restrictions=YYYYYY
   -o smtpd_helo_restrictions=ZZZZ

2587 inet n - - - - smtpd
   -o smtpd_enforce_tls=yes
   -o smtpd_tls_security_level=encrypt
   -o smtpd_sasl_auth_enable=yes
   -o smtpd_client_restrictions=permit_sasl_authenticated,reject
   -o smtpd_sender_restrictions=
   -o smtpd_recipient_restrictions=XXXXXXX
   -o smtpd_sender_restrictions=YYYYYY
   -o smtpd_helo_restrictions=XXXXX

Then edit your /etc/tor/torrc

HiddenServiceDir /var/lib/tor/smtp_onion
HiddenServicePort 25 2525
HiddenServicePort 587 2587

3. If your server is not used by other servers to relay email, then you can use the newer postfix variable that was designed for restricting relays smtpd_relay_restrictions (remember NOT to use permit_mynetworks there) to allow emails to be “relayed” by the onion service:
/etc/postfix/main.cf

smtpd_relay_restrictions = permit_sasl_authenticated,
        reject_unauth_destination

smtpd_recipient_restrictions =
        reject_unknown_recipient_domain,
        check_recipient_access hash:$checks_dir/recipient_access,
        permit_sasl_authenticated,
        permit_mynetworks,
        permit

Concerns
Can hidden services scale to support hundreds or thousands of connections e.g. from a mailing list ? who knows…
This type of setup needs the help of big fishes (large independent email providers like Riseup) to protect the small fishes (your own email server). So a new problem arises, bootstrapping and I’m not really sure this problem has any elegant solution. The more servers use this setup though, the more useful it becomes against passive adversaries trying to correlate who communicates with whom.
The above setup works better when there are more than one hidden services running on the receiving side so a passive adversary won’t really know that the incoming traffic is SMTP, eg when you also run a (busy) HTTP server as a hidden service at the same machine.
Hey, where did MX record lookup go ?

Trying it
If anyone wants to try it, you can send me an email using voidgrz25evgseyc.onion as the Hidden SMTP Service (in the transport map).

Links:
http://www.postfix.org/master.5.html
http://www.groovy.net/ww/2012/01/torfixbis
ehloonion/onionmx github repository

*Update 01/02/2015 Added information about !Open Relaying and torsocks version 2 configuration*
*Update 11/10/2016 Updated information about !Open Relaying*
*Update 14/06/2018 Added link to ehloonion/onionmx*

Creating a new GPG key with subkeys

A few weeks ago I created my new GPG/PGP key with subkeys and a few people asked me why and how. The rationale for creating separate subkeys for signing and encryption is written very nicely in the subkeys page of the debian wiki. The short answer is that having separate subkeys makes key management a lot easier and protects you in certain occasions, for example you can create a new subkey when you need to travel or when your laptop gets stolen, without losing previous signatures. Obviously you need to keep your master key somewhere very very safe and certainly not online or attached to a computer.

You can find many other blog posts on the net on the subject, but most of them are missing a few parts. I’ll try to keep this post as complete as possible. If you are to use gpg subkeys you definitely need an encrypted usb to store the master key at the end. So if you don’t already have an encrypted USB go and make one first.

When this process is over you will have a gpg keypair on your laptop without the master key, you will be able to use that for everyday encryption and signing of documents but there’s a catch. You won’t be able to sign other people’s keys. To do that you will need the master key. But that is something that does not happen very often so it should not be a problem in your everyday gpg workflow. You can read about signing other people’s keys at the end of this post. AFAIK you can’t remove your master key using some of the gpg GUIs, so your only hope is the command line. Live with it…

First some basic information that will be needed later.
When listing secret keys with gpg -K keys are marked with either ‘sec’ or ‘ssb’. When listing (public) keys with gpg -k keys are marked with ‘pub’ or ‘sub’.

sec => 'SECret key'
ssb => 'Secret SuBkey'
pub => 'PUBlic key'
sub => 'public SUBkey'

When editing a key you will see a usage flag on the right. Each key has a role and that is represented by a character. These are the roles and their corresponding characters:

Constant           Character      Explanation
─────────────────────────────────────────────────────
PUBKEY_USAGE_SIG      S       key is good for signing
PUBKEY_USAGE_CERT     C       key is good for certifying other signatures
PUBKEY_USAGE_ENC      E       key is good for encryption
PUBKEY_USAGE_AUTH     A       key is good for authentication

Before doing anything make sure you have a backup of your .gnupg dir.
$ umask 077; tar -cf $HOME/gnupg-backup.tar -C $HOME .gnupg

Secure preferences
Now edit your .gnupg/gpg.conf and add or change the following settings (most are stolen from Riseup: OpenPGP Best Practices):

# when outputting certificates, view user IDs distinctly from keys:
fixed-list-mode
# long keyids are more collision-resistant than short keyids (it's trivial to make a key with any desired short keyid)
keyid-format 0xlong
# when multiple digests are supported by all recipients, choose the strongest one:
personal-digest-preferences SHA512 SHA384 SHA256 SHA224
# preferences chosen for new keys should prioritize stronger algorithms:
default-preference-list SHA512 SHA384 SHA256 SHA224 AES256 AES192 AES CAST5 BZIP2 ZLIB ZIP Uncompressed
# If you use a graphical environment (and even if you don't) you should be using an agent:
# (similar arguments as https://www.debian-administration.org/users/dkg/weblog/64)
use-agent
# You should always know at a glance which User IDs gpg thinks are legitimately bound to the keys in your keyring:
verify-options show-uid-validity
list-options show-uid-validity
# when making an OpenPGP certification, use a stronger digest than the default SHA1:
cert-digest-algo SHA256
# prevent version string from appearing in your signatures/public keys
no-emit-version 

Create new key
Time to create the new key. I’m marking user input with bold (↞) arrows

$ gpg --gen-key
gpg (GnuPG) 1.4.12; Copyright (C) 2012 Free Software Foundation, Inc.
This is free software: you are free to change and redistribute it.
There is NO WARRANTY, to the extent permitted by law.

Please select what kind of key you want:
   (1) RSA and RSA (default)
   (2) DSA and Elgamal
   (3) DSA (sign only)
   (4) RSA (sign only)
Your selection?
Your selection?  1 ↞↞↞↞ 
RSA keys may be between 1024 and 4096 bits long.
What keysize do you want? (2048)  4096 ↞↞↞↞ 
Requested keysize is 4096 bits
Please specify how long the key should be valid.
         0 = key does not expire
      <n>  = key expires in n days
      <n>w = key expires in n weeks
      <n>m = key expires in n months
      <n>y = key expires in n years
Key is valid for? (0)  0 ↞↞↞↞ 
Key does not expire at all
Is this correct? (y/N)  y ↞↞↞↞ 
You need a user ID to identify your key; the software constructs the user ID
from the Real Name, Comment and Email Address in this form:
    "Heinrich Heine (Der Dichter) <heinrichh@duesseldorf.de>"
Real name: foo bar ↞↞↞↞ 
Email address: foobar@void.gr ↞↞↞↞ 
Comment:
You selected this USER-ID:
"foo bar <foobar@void.gr>"

Change (N)ame, (C)omment, (E)mail or (O)kay/(Q)uit?  O ↞↞↞↞ 
You need a Passphrase to protect your secret key.

We need to generate a lot of random bytes. It is a good idea to perform
some other action (type on the keyboard, move the mouse, utilize the
disks) during the prime generation; this gives the random number
generator a better chance to gain enough entropy.
.............+++++
..+++++

gpg: key 0x6F87F32E2234961E marked as ultimately trusted
public and secret key created and signed.

gpg: checking the trustdb
gpg: 3 marginal(s) needed, 1 complete(s) needed, PGP trust model
gpg: depth: 0  valid:   3  signed:  14  trust: 0-, 0q, 0n, 0m, 0f, 3u
gpg: depth: 1  valid:  14  signed:   9  trust: 13-, 1q, 0n, 0m, 0f, 0u
gpg: next trustdb check due at 2014-03-18
pub   4096R/0x6F87F32E2234961E 2013-12-01
      Key fingerprint = 407E 45F0 D914 8277 3D28  CDD8 6F87 F32E 2234 961E
uid                 [ultimate] foo bar <foobar@void.gr>
sub   4096R/0xD3DCB1F51C37970B 2013-12-01

Optionally, you can add another uid and add it as the default:

$ gpg --edit-key 0x6F87F32E2234961E                                      
gpg (GnuPG) 1.4.12; Copyright (C) 2012 Free Software Foundation, Inc.
This is free software: you are free to change and redistribute it.
There is NO WARRANTY, to the extent permitted by law.

Secret key is available.

pub  4096R/0x6F87F32E2234961E  created: 2013-12-01  expires: never       usage: SC  
                               trust: ultimate      validity: ultimate
sub  4096R/0xD3DCB1F51C37970B  created: 2013-12-01  expires: never       usage: E   
[ultimate] (1). foo bar <foobar@void.gr>
gpg> adduid ↞↞↞↞ 
Real name: foo bar ↞↞↞↞ 
Email address: foobar@riseup.net ↞↞↞↞ 
Comment: 
You selected this USER-ID:
    "foo bar <foobar@riseup.net>"
Change (N)ame, (C)omment, (E)mail or (O)kay/(Q)uit?  O ↞↞↞↞ 
You need a passphrase to unlock the secret key for
user: "foo bar <foobar@void.gr>"
4096-bit RSA key, ID 0x6F87F32E2234961E, created 2013-12-01

pub  4096R/0x6F87F32E2234961E  created: 2013-12-01  expires: never       usage: SC  
                               trust: ultimate      validity: ultimate
sub  4096R/0xD3DCB1F51C37970B  created: 2013-12-01  expires: never       usage: E   
[ultimate] (1)  foo bar <foobar@void.gr>
[ unknown] (2). foo bar <foobar@riseup.net>
gpg> uid 2 ↞↞↞↞ 
gpg> primary ↞↞↞↞ 
gpg> save ↞↞↞↞ 

Let’s see what we’ve got until now, 0x6F87F32E2234961E is the master key (SC flags) and 0xD3DCB1F51C37970B (E flag)is a separate subkey for encryption.

Add new signing subkey
Since we already have a separate encryption subkey, it’s time for a new signing subkey. Expiration dates for keys is a very hot topic. IMHO there’s no point in having an encryption subkey with an expiration date, expired keys are working just fine for decryption anyways, so I’ll leave it without one, but I want the signing key that I’m regularly using to have an expiration date. You can read more about this topic on the gnupg manual (Selecting expiration dates and using subkeys).

$ gpg --edit-key 0x6F87F32E2234961E
gpg (GnuPG) 1.4.12; Copyright (C) 2012 Free Software Foundation, Inc.
This is free software: you are free to change and redistribute it.
There is NO WARRANTY, to the extent permitted by law.

Secret key is available.

pub  4096R/0x6F87F32E2234961E  created: 2013-12-01  expires: never       usage: SC  
                               trust: ultimate      validity: ultimate
sub  4096R/0xD3DCB1F51C37970B  created: 2013-12-01  expires: never       usage: E   
[ultimate] (1). foo bar <foobar@riseup.net>
[ultimate] (2)  foo bar <foobar@void.gr>
gpg> addkey ↞↞↞↞ 

Key is protected.

You need a passphrase to unlock the secret key for
user: “foo bar <foobar@riseup.net>”
4096-bit RSA key, ID 0x6F87F32E2234961E, created 2013-12-01

Please select what kind of key you want:
(3) DSA (sign only)
(4) RSA (sign only)
(5) Elgamal (encrypt only)
(6) RSA (encrypt only)

Your selection? 4 ↞↞↞↞ 
RSA keys may be between 1024 and 4096 bits long.
What keysize do you want? (2048) 4096 ↞↞↞↞ 
Requested keysize is 4096 bits
Please specify how long the key should be valid.
         0 = key does not expire
        = key expires in n days
      w = key expires in n weeks
      m = key expires in n months
      y = key expires in n years
Key is valid for? (0) 5y ↞↞↞↞ 
Key expires at Fri 30 Nov 2018 03:36:47 PM EET
Is this correct? (y/N) y ↞↞↞↞ 
Really create? (y/N) y ↞↞↞↞ 
We need to generate a lot of random bytes. It is a good idea to perform
some other action (type on the keyboard, move the mouse, utilize the
disks) during the prime generation; this gives the random number
generator a better chance to gain enough entropy.
+++++
...............+++++

pub  4096R/0x6F87F32E2234961E  created: 2013-12-01  expires: never       usage: SC  
                               trust: ultimate      validity: ultimate
sub  4096R/0xD3DCB1F51C37970B  created: 2013-12-01  expires: never       usage: E   
sub  4096R/0x296B12D067F65B03  created: 2013-12-01  expires: 2018-11-30  usage: S   
[ultimate] (1). foo bar <foobar@riseup.net>
[ultimate] (2)  foo bar <foobar@void.gr>
gpg> save ↞↞↞↞ 

As you can see there’s a new subkey 0x296B12D067F65B03 with just the S flag, that the signing subkey.
Before moving forward it’s wise to create a revocation certificate:

$ gpg --output 0x6F87F32E2234961E.gpg-revocation-certificate --armor --gen-revoke 0x6F87F32E2234961E
sec  4096R/0x6F87F32E2234961E 2013-12-01 foo bar <foobar@riseup.net>

Create a revocation certificate for this key? (y/N) y
Please select the reason for the revocation:
  0 = No reason specified
  1 = Key has been compromised
  2 = Key is superseded
  3 = Key is no longer used
  Q = Cancel
(Probably you want to select 1 here)
Your decision?  1 ↞↞↞↞ 
Enter an optional description; end it with an empty line:
> This revocation certificate was generated when the key was created. ↞↞↞↞ 
> 
Reason for revocation: Key has been compromised
This revocation certificate was generated when the key was created.
Is this okay? (y/N) y ↞↞↞↞ 
You need a passphrase to unlock the secret key for
user: "foo bar <foobar@riseup.net>"
4096-bit RSA key, ID 0x6F87F32E2234961E, created 2013-12-01

Revocation certificate created.

Please move it to a medium which you can hide away; if Mallory gets
access to this certificate he can use it to make your key unusable.
It is smart to print this certificate and store it away, just in case
your media become unreadable.  But have some caution:  The print system of
your machine might store the data and make it available to others!

Encrypt this file and store it someplace safe, eg your encrypted USB. You should definitely not leave it at your laptop’s hard disk. You can even print it and keep it in this form, it’s small enough so one could type it if needed.

Remove Master key
And now the interesting part, it’s time to remove the master key from your laptops’s keychain and just leave the subkeys. You will store the master key in the encrypted usb so it stays safe.

First go and backup your .gnupg dir on your encrypted USB. Don’t move forward until you do that. DON’T!

$ rsync -avp $HOME/.gnupg /media/encrypted-usb
or
$ umask 077; tar -cf /media/encrypted-usb/gnupg-backup-new.tar -C $HOME .gnupg

Did you backup your key? Are you sure ?

Then it’s time to remove the master key!

$ gpg --export-secret-subkeys 0x6F87F32E2234961E > /media/encrypted-usb/subkeys
$ gpg --delete-secret-key 0x6F87F32E2234961E
$ gpg --import /media/encrypted-usb/subkeys
$ shred -u /media/encrypted-usb/subkeys

What you’ve accomplished with this process is export the subkeys to /media/encrypted-usb/subkeys then delete the master key and re-import just the subkeys. Master key resides only on the encrypted USB key now. Don’t lose that USB key. USB keys are extremely cheap, make multiple copies of the encrypted key and place them in safe places, you can give one such key to your parents or your closest friend in case of emergency. For safety, make sure there’s at least one copy outside of your residence.

You can see the difference of the deleted master key by comparing the listing of the secret keys in your .gnupg and your /media/encrypted-usb/.gnupg/ dir.

$ gpg -K 0x6F87F32E2234961E                                             
sec#   4096R/0x6F87F32E2234961E 2013-12-01
uid                            foo bar <foobar@riseup.net>
uid                            foo bar <foobar@void.gr>
ssb   4096R/0xD3DCB1F51C37970B 2013-12-01
ssb   4096R/0x296B12D067F65B03 2013-12-01 [expires: 2018-11-30] 
$ gpg --home=/media/encrypted-usb/.gnupg/ -K 0x6F87F32E2234961E                                             
sec   4096R/0x6F87F32E2234961E 2013-12-01
uid                            foo bar <foobar@riseup.net>
uid                            foo bar <foobar@void.gr>
ssb   4096R/0xD3DCB1F51C37970B 2013-12-01
ssb   4096R/0x296B12D067F65B03 2013-12-01 [expires: 2018-11-30] 

Notice the pound (#) in the ‘sec’ line from your ~/.gnupg/. That means that the master key is missing.

Upload your new key to the keyservers if you want to…

Key Migration
In case you’re migrating from an older key you need to sign your new key with the old one (not the other way around!)
$ gpg --default-key 0xOLD_KEY --sign-key 0x6F87F32E2234961E

Write a transition statement and sign it with both the old and the new key:

$ gpg --armor -b -u 0xOLD_KEY -o sig1.txt gpg-transition.txt
$ gpg --armor -b -u 0x6F87F32E2234961E -o sig2.txt gpg-transition.txt

That’s about it…upload the transition statement and your signatures to some public space (or mail it to your web of trust).

Signing other people’s keys
Because your laptop’s keypair does not have the master key anymore and the master key is the only one with the ‘C’ flag, when you want to sign someone else’s key, you will need to mount your encrypted USB and then issue a command that’s using that encrypted directory:
$ gpg --home=/media/encrypted-usb/.gnupg/ --sign-key 0xSomeones_keyid
Export your signature and send it back to people whose key you just signed..

Things to play with in the future
Next stop ? An OpenPGP Smartcard! (eshop) or a yubikey NEO, (related blogpost). Any Greeks want to join me for a mass (5+) order?

References
https://wiki.debian.org/subkeys
https://help.riseup.net/en/security/message-security/openpgp/best-practices
https://alexcabal.com/creating-the-perfect-gpg-keypair/

P.S. 0x6F87F32E2234961E is obviously just a demo key. You can find my real key here.
P.S.2 The above commands were executed on gpg 1.4.12 on Debian Wheezy. In the future the output of the commands will probably differ.

New gpg key

I’ve decided to change my old gpg key with a new RSA 4096bits.

My new gpg key id is 0x7011E02C or if you prefer the longer version 0x897C03177011E02C

Transition statement

Date: 11/11/2013

For a number of reasons[0], I've recently set up a new OpenPGP key,
and will be transitioning away from my old one.

The old key will continue to be valid for some time, but I prefer all
future correspondence to come to the new one.  I would also like this
new key to be re-integrated into the web of trust.  This message is
signed by both keys to certify the transition.

the old key was:

pub   1024D/0x4A0A1BC8E4F4FFE6 2008-03-19 [expires: 2014-03-18]
      Key fingerprint = 9EB8 31BE C618 07CE 1B51  818D 4A0A 1BC8 E4F4 FFE6

And the new key is:

pub   4096R/0x897C03177011E02C 2013-11-11
      Key fingerprint = 79B1 9198 B8F6 803B EC37  5638 897C 0317 7011 E02C

To fetch the new key, you can get it with:

  wget -q -O- https://void.gr/kargig/gpg/0x897C03177011E02C_pub.asc | gpg --import -

Or, to fetch my new key from a public key server, you can simply do:

  gpg --keyserver keys.gnupg.net --recv-key 0x897C03177011E02C

If you already know my old key, you can now verify that the new key is
signed by the old one:

  gpg --check-sigs 0x897C03177011E02C

If you don't already know my old key, or you just want to be double
extra paranoid, you can check the fingerprint against the one above:

  gpg --fingerprint 0x897C03177011E02C

George Kargiotakis

0. https://www.debian-administration.org/users/dkg/weblog/48

You can find the above text here, signed by my old key and my new key.

Greek PGP Web of Trust 2012 edition

I’ve very glad for hosting this guest post. Dorothea put some real effort into it. So…enjoy!

—————————————————————————————————————–
In 2008 Patroklos Argyroudis created the first visualization of the greek PGP web of trust, based on information supplied mostly by people who attended a keysigning party at Thessaloniki. You can read his related posts at sysc.tl/tag/web-of-trust/ [0]
In 2012, during the second cryptoparty [1] at hackerspace.gr [2], George Kargiotakis suggested if someone wanted to update the network. I decided to undertake the task and you can see some of the visualizations below.

Visualizations:
1. Venn of persons that have signed others and of persons that have been signed by others
2. Greek PGP network for 2012
3. Trust in the 2012 Greek PGP network
4. Highlighting the persons who have signed more people
5. Do people trust more persons than they are trusted by?
6. Geolocation of individuals (globally)
7. Geolocation of individuals (in Greece)
8. Gender percentages
9. Educational and research institutes in the PGP network
10. Animation: Formation through time of associations that were active in 2012
11. Communities and the ten most important positions in the 2012 Greek PGP network according to Eigen value centrality

Additional sections:
12. Outline of methodology
13. Keyserver & keys used
14. Notes on methodology
15. Software and visualization notes
16. Problems encountered and how you can help
17. Future plans
18. Web references
19. Synopsis
20. Communication
21. Thanks
(more…)

How Vodafone Greece degrades my Internet experience

The title may sound a bit pompous, but please read on and you’ll see how certain decisions can cripple, or totally disrupt modern Internet services and communications as these are offered(?) by Vodafone’s mobile Internet solutions.

== The situation ==
I’ve bought a mobile Internet package from Vodafone Greece in order to be able to have 3G access in places where I don’t have access to wifi or ethernet. I am also using a local caching resolver on my laptop (Debian Linux), running unbound software, to both speed up my connections and to have mandatory DNSSEC validation for all my queries. Many of you might ask why do I need DNSSEC validation of all my queries since only very few domains are currently using DNSSEC, well I don’t have a reply that applies to everyone, let’s just say for now that I like to experiment with new things. After all, this is the only way to learn new things, experiment with them. Let’s not forget though that many TLDs are now signed, so there are definitely a few records to play with. Mandatory DNSSEC validation has led me in the past to identify and investigate a couple other problems, mostly having to do with broken DNSSEC records of various domains and more importantly dig deeper into IPv6 and fragmentation issues of various networks. This last topic is so big that it needs a blog post, or even a series of posts, of it’s own. It’s my job after all to find and solve problems, that’s what system or network administrators do (or should do).

== My setup ==
When you connect your 3G dongle with Vodafone Greece, they sent you 2 DNS servers (two out of 213.249.17.10, 213.249.17.11, 213.249.39.29) through ipcp (ppp). In my setup though, I discard them and I just keep “nameserver 127.0.0.1” in my /etc/resolv.conf in order to use my local unbound. In unbound’s configuration I have set up 2 forwarders for my queries, actually when I know I am inside an IPv6 network I use 4 addresses, 2 IPv4 and 2 IPv6 for the same 2 forwarders. These forwarders are hosted where I work (GRNET NOC) and I have also set them up to do mandatory DNSSEC validation themselves.
So my local resolver, which does DNSSEC validation, is contacting 2 other servers who also do DNSSEC validation. My queries carry the DNS protocol flag that asks for DNSSEC validation and I expect them to validate every response possible.

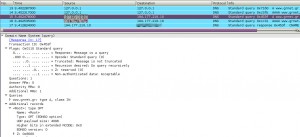
As you can see in the following screenshot, here’s what happens when I want to visit a website. I ask my local caching resolver, and that resolver asks one of it’s forwarders adding the necessary DNSSEC flags in the query.
The response might have the “ad” (authenticated) DNSSEC flag, depending whether the domain I’m visiting is DNSSEC signed or not.

[Screenshot of DNS queries]
dnssec_query

== The problem ==
What I noticed was that using this setup, I couldn’t visit any sites at all when I connected with my 3G dongle on Vodafone’s network. When I changed my /etc/resolv.conf to use Vodafone’s DNS servers directly, everything seemed work as normal, at least for browsing. But then I tried to query for DNSSEC related information on various domains manually using dig, Vodafone’s resolvers never sent me back any DNSSEC related information. Well actually they never sent me back any packet at all when I asked them for DNSSEC data.

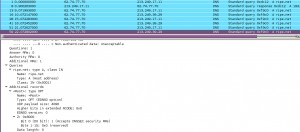
Here’s an example of what happens with and without asking for DNSSEC data. The first query is without requesting DNSSEC information and I get a normal reply, but upon asking for the extra DNSSEC data, I get nothing back.
[Screenshot of ripe.net +dnssec query through Vodafone’s servers]
no_dnssec_replies_by_vodafone

== Experimentation ==
Obviously changing my forwarders configuration in unbound to the Vodafone DNS servers did not work because Vodafone’s DNS servers never send me back any DNSSEC information at all. Since my unbound is trying to do DNSSEC validation of everything, obviously including the root (.) zone, I need to get back packets that contain these records. Else everything fails. I could get unbound working with my previous forwarders or with Vodafone’s servers as forwarders, only by disabling the DNSSEC validation, that is commenting out the auto-trust-anchor-file option.

Then I started doing tests on my original forwarders that I had in my configuration (and are managed by me). I could see that my query packets arrived at the server and the server always sent back the proper replies. But whenever the reply contained DNSSEC data, that packet was not forwarded to my computer through Vodafone’s 3G network.

More tests were to follow and obviously my first choice were Google’s public resolvers, 8.8.8.8 and 8.8.4.4. Surprise, surprise! I could get any DNSSEC related information I wanted. The exact same result I got upon testing with OpenDNS resolvers, 208.67.222.222 and 208.67.220.220. From a list of “fairly known” public DNS servers that I found here, only ScrubIT servers seems to be currently blocked by Vodafone Greece. Comodo DNS, Norton DNS, and public Verizon DNS all work flawlessly.

My last step was to try and get DNSSEC data over tcp instead of udp packets. Surprise, surprise again, well not at all any more… I could get back responses containing the DNSSEC information I wanted.

== Conclusion ==
Vodafone Greece for some strange reason (I have a few ideas, starting with…disabling skype) seems to “dislike” large UDP responses, among which are obviously DNS replies carrying DNSSEC information. These responses can sometimes be even bigger than 1500bytes. My guess is that in order to minimize hassle for their telephone support, they have whitelisted a bunch of “known” DNS servers. Obviously the thought of breaking DNSSEC and every DNSSEC signed domain for their customers hasn’t crossed their minds yet. What I don’t understand though is why their own DNS servers are not whitelisted. Since they trust other organizations’ servers to send big udp packets, why don’t they allow DNSSEC from their own servers? Misconfiguration? Ignorance? On purpose?

The same behavior can (sometimes -> further investigation needed here) be seen while trying to use OpenVPN over udp. Over tcp with the same servers, everything works fine. That reminds me I really need to test ocserv soon…

== Solution ==
I won’t even try to contact Vodafone’s support and try to convince their telephone helpdesk to connect me to one of their network/infrastructure engineers. I think that would be completely futile. If any of you readers though, know anyone working at Vodafone Greece in _any_ technical department, please send them a link to this blog post. You will do a huge favor to all Vodafone Greece mobile Internet users and to the Internet itself.

The Internet is not just for HTTP stuff, many of us use it in various other ways. It is unacceptable for any ISP to block, disrupt, interrupt or get in the middle of such communications.
Each one of us users should be able to use DNSSEC without having to send all our queries to Google, OpenDNS or any other information harvesting organization.

== Downloads ==
I’m uploading some pcaps here for anyone who wants to take a look. Use wireshark/tcpdump to read them.

A. tcpdump querying for a non-DNSSEC signed domain over 3G. One query without asking for DNSSEC and two queries asking for DNSSEC, all queries go to DNS server 194.177.210.10. All queries arrived back. The tcpdump was created on 194.177.210.10.
vf_non-dnssec_domain_query.pcap

B. tcpdump querying for a DNSSEC signed domain over 3G. One query without asking for DNSSEC and three queries asking for DNSSEC, all queries go to DNS server 194.177.210.10. The last three queries never arrived back at my computer. The tcpdump was created on 194.177.210.10.
vf_dnssec_domain_query.pcap

C. tcpdump querying for a DNSSEC signed domain over 3G. One query without asking for DNSSEC and another one asking for DNSSEC, all queries go to DNS Server 8.8.8.8. All queries arrived back. The tcpdump was created on my computer using the PPP interface.
vf_ripe_google_dns.pcap

World city map of Tor nodes

Some months ago I started playing with the idea of creating a world map that would have every Tor node on it. Obviously I wan’t the first one…I soon discovered Moritz Bartl’s post on the same topic. Luckilly he had his code posted on Github so I could fork it and add features that I wanted. The original python script parsed the consensus and the misrodescriptors, put Tor nodes into some classes and created a KML file with some description on each node.

Some differences
I changed some parts of the python script to better suit my needs.
a. Create a separate kml files for each Tor node class.
b. Add new classes: Bad, Authority and Named.
c. Pay more attention on requesting every external URL over HTTPS.
d. Generate HTML code that displays those KMLs on a Google Maps overlay.
e. Add some small randomization to each nodes’s coordinates so that nodes in the same city don’t overlap.

You can find a complete changelog at kargig/tormap GitHub repo.

And here’s the outcome: World city map of Tor nodes at https://tormap.void.gr/
One of my main goals was to have selectable classes of nodes that will appear on the map.

To produce the map overlay, a cron script runs every hour, which is also the period it takes for Tor Authority nodes to produce a new consensus, and creates some static files which are then served by nginx.

I’m not a web developer/designer and I don’t really know any javascript. So please, feel free to fork my code and make it look better, run faster and add your own features. I’ll happily accept patches/pull requests!

Extras
On kargig/tormap repo you will also find a handy script, ‘runme.sh’, that downloads all necessary files that need to be parsed by the python script.

Missplaced nodes on the map
Well, blame MaxMind’s GeoIP City database for that. But I think it’s kinda funny to see Tor nodes in Siberia and in the middle of the sea though (look at the West coast of Africa), heh. For those wondering, these nodes are gathered there because their geoip Lat,Long is set to 0,0.
Really though, what’s “Ben’s Cat Shaque” diplayed there next to all those nodes in the west coast of Africa? Anyone has some clue ?

Conspriracy people
I’m sure that people who love conspriracy theories will start posting about those ‘Bad’ Tor nodes in Iran and Syria. Why do you think these are there ? What does it mean ? Let the flames begin!

Future TODO
a. OpenStreetMap
I have started working on an OpenStreetMap implementation of the above using OpenLayers. The biggest hurdle is that OSM does not provide a server that serves map tiles over HTTPS. Makes me wonder…is that actually so difficult ?
b. More stats
I would like to add small graphs on how the number of nodes in each class evolves.

Other Tor mapping efforts
https://b.kentbackman.com/2010/10/04/view-tor-exit-nodes-in-google-earth/
http://freehaven.net/~ioerror/maps/v3-tormap.html

Don’t forget, you can always help Tor by running a node/bridge or sending some money to Tor or EFF!

Review of the first Athens CryptoParty

On Sunday the 11th of November we finally had our first CryptoParty in Athens, Greece. We hosted it at the Athens Hackerspace.

Organizing
We organized our first CryptoParty in a very ad-hoc way. A pad was set up and advertised on Twitter/Facebook. Almost immediately people started writing their thoughts, views and interests there. We soon had a list of topics that people were interested in and another list of people willing to give presentations/workshops. Later on we set up a doodle so people would choose the most convenient dates for them. From the group of 50 people that originally expressed their interest to attend the CryptoParty, at least 20 voted on the doodle. That’s how the final date of November the 11th was chosen.

It was surprising/refreshing that even though everything was organized through an anonymously editable pad, nobody tried to vandalize it.

The actual event
Through the pad, we chose 3 topics for the first meeting. “Using SSL/TLS for your Internet communications”, an “introduction to Tor” and another “introduction to I2P”.
The time for the event was set for 12:00 in the morning, probably a very bad choice. The next one should definitely be later in the afternoon or even night. We learn by our mistakes though…People started showing up at around 11:30, but the event didn’t start until 12:30 when someone from hackerspace.gr gave a 5′ intro talk about what the hackerspace is to people who had never been there before. People kept coming even until 13:00 and the audience had grown to more than 30 people.
After the three workshops/presentations around 10-15 people stayed and we ordered pizza.

All in all I’d say it was fairly successful since more than 30 people came and actually did things to improve their security.

The presentations/workshops
Using SSL/TLS for your Internet communications” (in English) was my effort to show people how cleartext data travels through the Internet and how any intermediate “bad guy”/LEA can easily read or manipulate your data. People were instructed to install wireshark so they could actually see for themselves what the actual problem is. It was very “nice” to see their surprise upon watching cleartext packets flowing through their network cards. It was even nicer to see their surprise when I used tcpdump on hackerspace’s router to redirect traffic to wireshark running on a Debian laptop to display their data, without having “direct” access to their computer. Then people were introduced to the idea of Transport Layer Security (SSL/TLS), and how HTTPS protects their web data from prying eyes. After this tiny “privacy apocalypse” it was very easy to convince users to install HTTPS-Everywhere. And so they did. Afterwards they got instructions on how they should change SSL/TLS settings for their E-email and IM clients.
My original intention was to “scare” people a bit. It was funny to see their faces when they logged in to yahoo mail and they could see their emails cleartext on wireshark. People don’t understand how data travels through the Internet unless they experience it for themselves. I’m glad that people who had absolutely no idea about HTTPS are now using HTTPS-Everywhere to protect themselves. Hopefully they’ll show that to their friends as well.

Introduction to Tor” (in Greek) gave people an idea at what anonymity is, how it differs from security and how users should be combining both TLS and Tor usage for security and anonymity at the same time. A brief explanation of what hidden services are was given as well. Even though George asked people to download and install Tor Browser Bundle and use it, we’ll definitely need more “hands on” Tor workshops in the future. It will be interesting to convince more people to actually use it and why not, even set up their own hidden services.

Invisible Internet Project a.k.a. I2P” (in English) by @alafroiskiotos was probably the hardest of the three presentations to keep up for people that had no previous idea about anonymity networks. It’s unique architecture and some difficulties in it’s usage raised a lot of interesting questions by attendees.

Thoughts on future CryptoParties
After the end of the workshops/presentations we had a lengthy discussion with the attendees as to what they would like to see/experience in the future CryptoParties. Unfortunately people were not very vocal. Very few participated and openly expressed their thoughts/opinions. A great part of the discussion was spent trying to figure out whom should CryptoParty presentations/workshops target at, users? developers? geeks? It’s obviously very hard to target all groups of people at the same time.

So here are my thoughts on what future CryptoParties should be. CryptoParties should be about changing user habits, they should be closer to workshops than presentations. They should be focused mainly on users not developers nor computer science students. Just simple users. People don’t want theoretical talks about cryptography, they need advice they can use in their daily lives. It’s already very hard to talk about modern crypto to people who haven’t got a strong mathematical background, you have to oversimplify things. Oversimplifying things then makes geeks/nerds unhappy and still doesn’t “teach” people about proper crypto. Even a fairly “simple” HTTPS negotiation contains key crypto concepts that are very difficult for a “crypto-newbie” to grasp. So it’s a lose-lose situation.

We need to teach, or better convince, users on using good, secure, audited tools and not just tell them about technologies and concepts. We, weirdos, might like that, but most users don’t. People need our help to learn how to avoid “fancy” tools and false security prophets. We need to show them how security should be applied in a layered approach. Getting people to care about their own privacy is key to the success of CryptoParties in the way I see them. To achieve that, we, people that know a few things more than the average Joe, should all become volunteers to such efforts. We should be joining CryptoParties in order to help others and not in order to improve ourselves and our knowledge. (Actually when you study in order to make a good workshop/presentation you improve your own knowledge as well, but let’s leave that beside for now.) We can have our separate geeky/nerdy events to present fancy tech and cool crypto stuff, but let’s keep CryptoParties simple and practical. Oh and we’ll need to repeat things again and again and again. That’s the only way people might change their habits.

If you want to find out more about the next Athens CryptoParty keep an eye at Hackerspace’s events and the athens cryptoparty pad. Join us!

Good luck to all the CryptoParties worldwide!

Bypassing censorship devices by obfuscating your traffic using obfsproxy

*WARNING* 14/01/2014 This post is quite deprecated. For example obfsproxy has been completely rewritten in python and there is a newer and more secure replacement of obfs2, named obfs3. Please read this obfsproxy-debian-instructions for any updates.

Some countries like China, Iran, Ethiopia, Kazakhstan and others, like installing some nasty little boxes at the edges of their country’s “internet feed” to monitor and filter traffic. These little boxes are called DPI (Deep Packet Inspection) boxes and what they do, is sniff out every little packet flowing through them to find specific patterns and then they provide their administrator with the option to block traffic that matches these patterns. These boxes are very sophisticated and they don’t just filter traffic by src, dst or port, they filter traffic by the content (payload) the packets carry.
Unfortunately, it’s not just these countries that deploy DPI technologies, but some private companies also use such devices in order to monitor their employees.

The 10 thousand feet view
Tor is a nice way to avoid basic censorship technologies, but sometimes DPI technology is so good that it can fingerprint Tor traffic, which is already encrypted, and block it. In response to that, Tor people devised a technology called Pluggable Transports whose job is to obfuscate traffic in various ways so that it looks like something different than it actually is. For example it can make Tor traffic look like a skype call using SkypeMorph or one can use Obfsproxy to obfuscate traffic to look like…nothing, or at least nothing easily recognizable. What’s cool about obfsproxy though is that one can even use it separately from Tor, to obfuscate any connection he needs to.

A warning
Even though obfsproxy encrypts traffic and makes it look completely random, it’s not a fool proof solution for everything. It’s basic job is to defend against DPI that can recognize/fingerprint TLS connections. If someone has the resources he could potentially train his DPI box to “speak” the obfsproxy protocol and eventually decrypt the obfuscated traffic. What this means is that obfsproxy should not be used as a single means of protection and it should just be used as a wrapper _around_ already encrypted SSL traffic.
If you’re still in doubt about what can obfsproxy protect you from and from what it can’t, please read the Obfsproxy Threat Model document.

Two use cases
Obfuscate an SSH and an OpenVPN connection.
Obviously one needs a server outside the censorship perimeter that he or someone else will run the obfsproxy server part. Instructions on installing obfsproxy on Debian/Ubuntu are given in my previous blog post setting up tor + obfsproxy + brdgrd to fight censhorship. Installing netcat, the openbsd version; package name is netcat-openbsd on Debian/Ubuntu, is also needed for the SSH example.

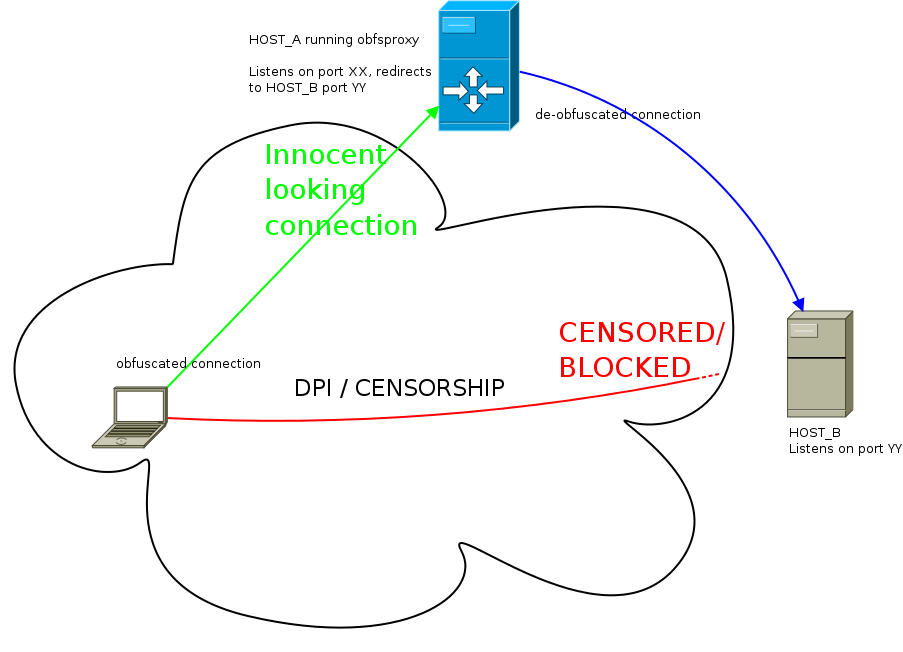
What both examples do is obfuscate a TLS connection through an obfsproxy server so that it looks innocent. Assuming that the most innocent looking traffic is HTTP, try running the obfsproxy server part on port 80.

SSH connection
Scenario:
USER: running ssh client
HOST_A (obfsproxy): running obfsproxy on port 80 and redirecting to HOST_B port 22
HOST_B (dst): Running SSH server on port 22

What one needs to do is setup the following “tunneling”:
ssh client —> [NC SOCKS PROXY] —> obfsproxy client (USER)—> obfsproxy server (HOST_A) —> ssh server (HOST_B)

Steps:
1. on HOST_A setup obfsproxy server to listen for connection and redirect to HOST_B:
# screen obfsproxy --log-min-severity=info obfs2 --dest=HOST_B:22 server 0.0.0.0:80

2. on USER’s box, then configure obfsproxy client to setup a local socks proxy that will obfuscate all traffic passing through it:
$ screen obfsproxy --log-min-severity=info obfs2 socks 127.0.0.1:9999
Then instead of SSH-ing directly to HOST_B, the user has to ssh to HOST_A port 80 (where obfsproxy server is listening).

3. on USER’s box again, edit ~/.ssh/config and add something along the following lines:

Host HOST_A
    ProxyCommand /bin/nc.openbsd -x 127.0.0.1:9999 %h %p

This will force all SSH connections to HOST_A to pass through the local (obfsproxy) socks server listening on 127.0.0.1:9999

4. Finally run the ssh command:
$ ssh -p 80 username@HOST_A

That’s it. The connection will now pass get obfuscated locally, pass through obfsproxy server at HOST_A and then finally reach it’s destination at HOST_B.

OpenVPN connection
Scenario:
USER: running OpenVPN client
HOST_A (obfsproxy): running obfsproxy on port 80 and redirecting to HOST_B TCP port 443
HOST_B (dst): Running OpenVPN server on port 443

What one needs to do is setup the following “tunneling”:
openvpn client —> obfsproxy client (USER)—> obfsproxy server (HOST_A) —> OpenVPN server (HOST_B)

Steps:
1. on HOST_A setup obfsproxy server to listen for connection and redirect to HOST_B:
# screen obfsproxy --log-min-severity=info obfs2 --dest=HOST_B:443 server 0.0.0.0:80

2. on USER’s box, then configure obfsproxy client to setup a local socks proxy that will obfuscate all traffic passing through it:
$ screen obfsproxy --log-min-severity=info obfs2 socks 127.0.0.1:9999
Then instead of connecting the OpenVPN client directly to HOST_B, the user has edit OpenVPN config file to connect to HOST_A port 80 (where obfsproxy server is listening).

3. on USER’s box again, edit your openvpn config file, change the ‘port’ and ‘remote’ lines and add a ‘socks-proxy’ one:

port 80
remote HOST_A
socks-proxy 127.0.0.1 9999

This will instruct the OpenVPN client to connect to HOST_A passing through the local (obfsproxy) socks server listening on 127.0.0.1:9999

4. Finally run the openvpn client command:
$ openvpn client.config

That’s it.

Security Enhancement
You can “enhance” obfproxy’s security by adding a shared secret parameter to command line, so anyone who doesn’t have this secret key won’t be able to use the obfsproxy server, decryption of packets will fail:
# screen obfsproxy --log-min-severity=info obfs2 --shared-secret="foobarfoo" --dest=HOST_B:443 server 0.0.0.0:80
$ screen obfsproxy --log-min-severity=info obfs2 --shared-secret="foobarfoo" socks 127.0.0.1:9999

Documentation
Or at least…some documentation.

Your best chance to understand the internals of obfsproxy is to read the protocol specification

For more info about obfsproxy client part, read the documentation here: obfsproxy client external
For more info about obfsproxy server part, read the documentation here: obfsproxy server external

Screenshots
For those who like meaningless screenshots, here’s what wireshark (which is certainly NOT a DPI) can tell about a connection without and with obfsproxy:

Without obfsproxy

With obfsproxy

*Update*
one can find openvpn configuration files for use with obfsproxy here:
Linux Client
Windows Client

setting up tor + obfsproxy + brdgrd to fight censhorship

*WARNING* 14/01/2014 This post is quite deprecated. For example obfsproxy has been completely rewritten in python and there is a newer and more secure replacement of obfs2, named obfs3. Please read this obfsproxy-debian-instructions for any updates.

*Updated* look at the bottom for list of changes

This post is a simple guide to create a debian/ubuntu packages out of the latest versions of Tor, obfsproxy and brdgrd in order to setup a “special gateway” and help people who face censorship issues. Sharing some of your bandwidth helps a lot of people get back their freedom.

Tor
I guess most people already know what Tor is, quoting from Tor’s website:

Tor is a network of virtual tunnels that allows people and groups to improve their privacy and security on the Internet. It also enables software developers to create new communication tools with built-in privacy features. Tor provides the foundation for a range of applications that allow organizations and individuals to share information over public networks without compromising their privacy.

obfsproxy

obfsproxy is a tool that attempts to circumvent censorship, by transforming the Tor traffic between the client and the bridge. This way, censors, who usually monitor traffic between the client and the bridge, will see innocent-looking transformed traffic instead of the actual Tor traffic.

brdgrd

brdgrd is short for “bridge guard”: A program which is meant to protect Tor bridges from being scanned (and as a result blocked) by the Great Firewall of China.

Combining these to work together is quite easy if you follow this simple guide/howto.


////// Become root
$ sudo su -

////// Get build tools/packages
# cd /usr/src/
# apt-get install build-essential libssl-dev devscripts git-core autoconf debhelper autotools-dev libevent-dev dpatch pkg-config
# apt-get install hardening-includes asciidoc docbook-xml docbook-xsl xmlto
# apt-get install screen libnetfilter-queue-dev

////// Get latest versions of tor/obfsproxy/brdgrd
# git clone https://git.torproject.org/debian/obfsproxy.git
# git clone https://git.torproject.org/debian/tor.git
# git clone https://git.torproject.org/brdgrd.git

////// Compile obfsproxy & create package
# cd obfsproxy/
# ./autogen.sh 
# debuild -uc -us 

////// Compile tor & create package
# cd ../tor/
# ./autogen.sh 
# debuild -uc -us 

////// Install packages
////// The following package versions might be different depending on your configuration. Change them appropriately by looking at the deb files in your path: ls *.deb

# cd ..
# dpkg -i tor-geoipdb_0.2.4.3-alpha-1_all.deb obfsproxy_0.1.4-2_amd64.deb tor_0.2.4.3-alpha-1_amd64.deb

////// Create Tor configuration
////// PLEASE SEE THE CHANGEME_X VARIABLE BELOW BEFORE RUNNING THE FOLLOWING COMMAND

# cat > /etc/tor/torrc << EOF 
AvoidDiskWrites 1
DataDirectory /var/lib/tor
ServerTransportPlugin obfs2 exec /usr/bin/obfsproxy --managed
Log notice file /var/log/tor/notices.log
## If you want to enable management port uncomment the following 2 lines and add a password
## ControlPort 9051
## HashedControlPassword 16:CHANGEME
## CHANGEME_1 -> provide a nickname for your bridge, can be anything you like.
Nickname CHANGEME_1
## CHANGEME_2 -> How many KB/sec will you share. Don't be stingy! Try putting _at least_ 20 KB.
RelayBandwidthRate CHANGEME_2 KB
## CHANGEME_3 -> Put a slightly higher value than your previous one. e.g if you put 500 on CHANGEME_2, put 550 on CHANGEME_3.
RelayBandwidthBurst CHANGEME_3 KB
ExitPolicy reject *:* 
## CHANGEME_4 -> If you want others to be able to contact you uncomment this line and put your GPG fingerprint for example.
#ContactInfo CHANGEME_4
ORPort 443 
#ORPort [2001:db8:1234:5678:9012:3456:7890:1234]:443
BridgeRelay 1
## CHANGEME_5 -> If you don't want to publish your bridge in BridgeDB, so you can privately share it with your friends uncomment the following line
#PublishServerDescriptor 0
EOF

////// Restart Tor

# /etc/init.d/tor restart

////// Compile and run brdgrd
////// If you've changed ORport in Tor config above, be sure to change the "--sport 443" port below as well
////// brdgrd does not help since obfsproxy is already running in front of the bridge, but won't hurt either.

# cd brdgrd/
# make
# iptables -A OUTPUT -p tcp --tcp-flags SYN,ACK SYN,ACK --sport 443 -j NFQUEUE --queue-num 0
////// brdgrd Can't do IPv6 yet...so the next line is commented out
////// ip6tables -A OUTPUT -p tcp --tcp-flags SYN,ACK SYN,ACK --sport 443 -j NFQUEUE --queue-num 0
////// You can run brdgrd without root, just by setting some correct cap_net_admin rights
////// Instead of: screen -dmS brdgrd ./brdgrd -v
$ sudo screen -dmS brdgrd setcap cap_net_admin=ep ./brdgrd -v

# tail -f /var/log/tor/notices.log

The above guide has been tested on Debian Squeeze and Ubuntu 12.04.

That’s it. You just made the world a better place.

*Update*
I’ve made some changes to the post according to comments on the blog post and #tor-dev.
a) Changed URLs for the git clone operations to https:// instead of git://
b) Changed brdgrd git url to gitweb.torproject.org instead of github.
c) Changed config sections of torrc file
d) Added some more info on brdgrd

*Update2*
Tor has published “official” instructions for setting up obfsproxy bridges on Debian boxes –> Setting up an Obfsproxy Bridge on Debian/Ubuntu

*Update3*
Update sample config to inform about unpublished bridges.

*Experimental* Chrome extension containing Greek HTTPS-Everywhere rules

I’ve just uploaded an experimental version of HTTPS-Everywhere Google Chrome extension containing Greek rules.

You can find it on https-everywhere-greek-rules downloads page on github.

To install it, download the .crx from github, open Extensions Settings and drag the downloaded .crx on the Extensions page. It will prompt you to install it.

After installation you can visit www.void.gr or www.nbg.gr to test it. You should be seeing a new icon on the left of the url bar to notify you that HTTPS-Everywhere applied some rules.

I’ve tested it on Google Chrome Version 21 on Linux and it seems to work ok. If you have any problems open up an issue on github.

Happy safer surfing…

Greek rules for HTTPS Everywhere

HTTPS Everywhere is a browser addon by EFF whose job is to redirect you to the HTTPS versions of certain, whitelisted, web sites. What this means is that HTTPS Everywhere protects your communication with those websites by forcing them to be encrypted.

The current HTTPS Everywhere ruleset lacks any Greek websites, so I started yet-another-list to create rules for Greek websites. This is the fourth list I’m maintaing after GrRBL, Greek Spammers Blacklist and Greek AdblockPlus Filter rules and it is the only one where being included is actually a good thing.

You can find some more info about Greek rules for HTTPS Everywhere on my github page.

Until the rules get adopted upstream by HTTPS Everywhere team, in order to use them you should download the rules and place them inside your Firefox profile directory. But first of all you need to install the plugin/extension/addon/call-me-whatever-you-want by going to HTTPS Everywhere page.

Step 1: Instructions for Linux users
Go to the HTTPSEverywhereUserRules directory inside your firefox profile directory:

$ cd .mozilla/firefox/XYZXYZXYZ.default/HTTPSEverywhereUserRules/
(XYZXYZXYZ will be different in your machine)

and download the current Greek ruleset:
$ wget https://raw.github.com/kargig/https-everywhere-greek-rules/master/Greek.xml

Step 1: Instructions for Windows users
Download https://raw.github.com/kargig/https-everywhere-greek-rules/master/Greek.xml with your favorite browser.
Then, according to this Mozilla support page, open Fifefox, go to Help->Troubleshooting Information and under the Application Basics section, click on Open Containing Folder. There a window will appear and you should copy the previously downloaded Greek.xml file inside the HTTPSEverywhereUserRules folder.

Step 2: Instructions for any OS
Either restart your browser to load the new rules or click the HTTPS Everywhere icon beside the url bar, select “Disable HTTPS Everywhere”, then click it again and select “Enable HTTPS Everywhere”. The new rules should now be loaded, you can test by going to http://void.gr and it should immediately redirect you to https://void.gr

Some notes
The ruleset is experimental. If you find any problems please report them as issues to github.
If you want a Greek website added to the list, either report it as a new issue on github or fork the repository, add your own rules and open a pull request.

A small rant
I found some webmails in Greece that don’t even offer HTTPS as an option to the user. They ‘POST’ user details, including passwords of course, over unencrypted HTTP connections. I will be updating a text file called hallofshame.txt inside the github reposity of Greek rules for HTTPS Everywhere with such websites. I am planning to inform the operators of such websites every now and then, so if you know any other cases please open up new issues so we can help protect innocent users.

A big rant on current HTTPS status of top Greek websites
The status of HTTPS support on top 100 Greek websites (according to Alexa) is SAD. No wait, it is EXTEMELY SAD. Out of these 100 websites, taking into account only the ones that are actually run by Greeks, that means excluding Google, Facebook, Youtube, LinkedIn, etc, only 2, yes you read correctly, just two websites offer HTTPS support.
The reason 95% the others don’t is probably because they are based on Akamai-zed services and either don’t have the money to buy Akamai’s HTTPS products or don’t have the technical skills to do it properly.

If you don’t run an Akamai-zed website and want a completely free 1-year SSL certificate please visit https://www.startssl.com/. If you need professional help with your setup please don’t hesitate to contact.

There’s a very good (financial) explanation why these high traffic Greek sites have prefered Akamai’s services and haven’t deployed their own servers in Greece but this will be the content of another blog post coming soon.